Back to Help & FAQs
How to set up a private registration page for your meeting
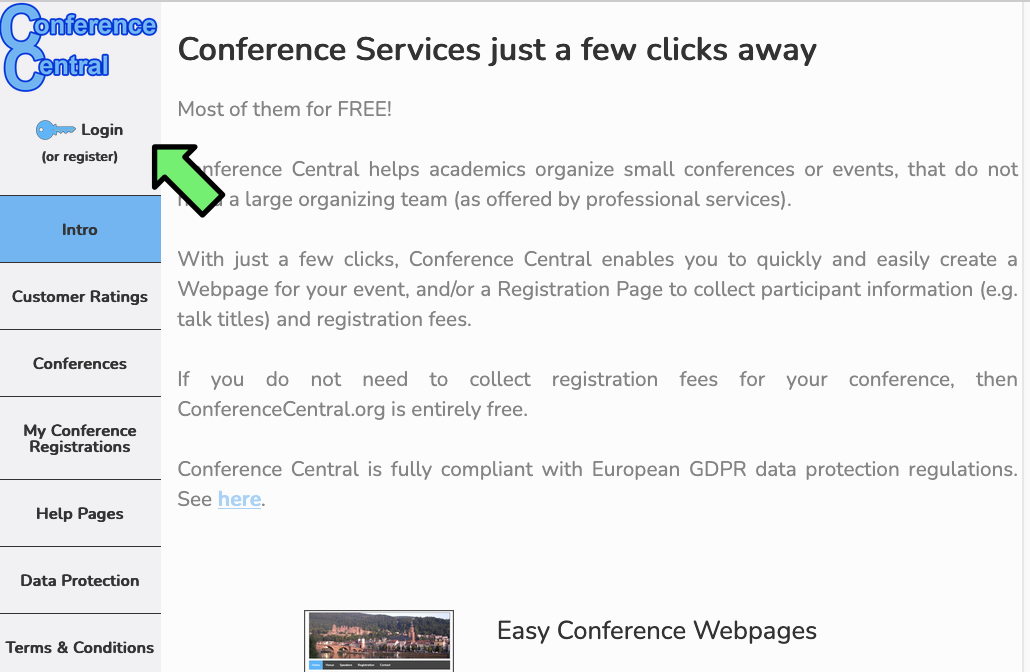
- Login to your account.
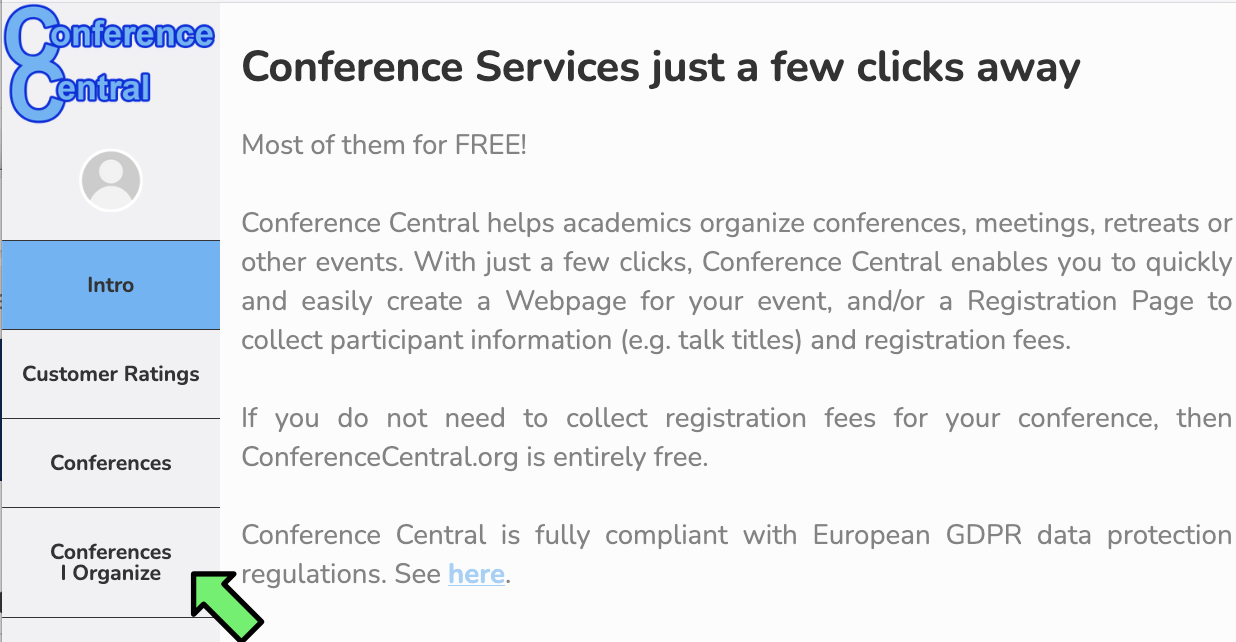
- Click on "Conferences I Organize"
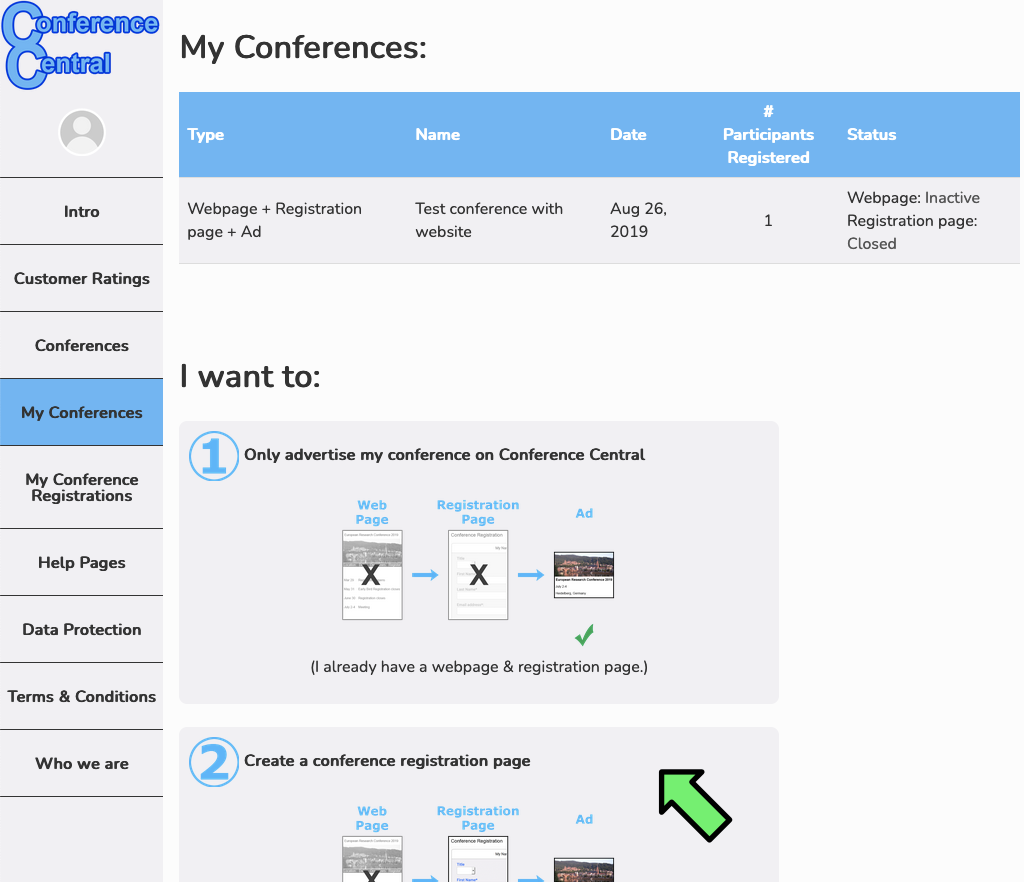
- Click on "Create a conference registration page"
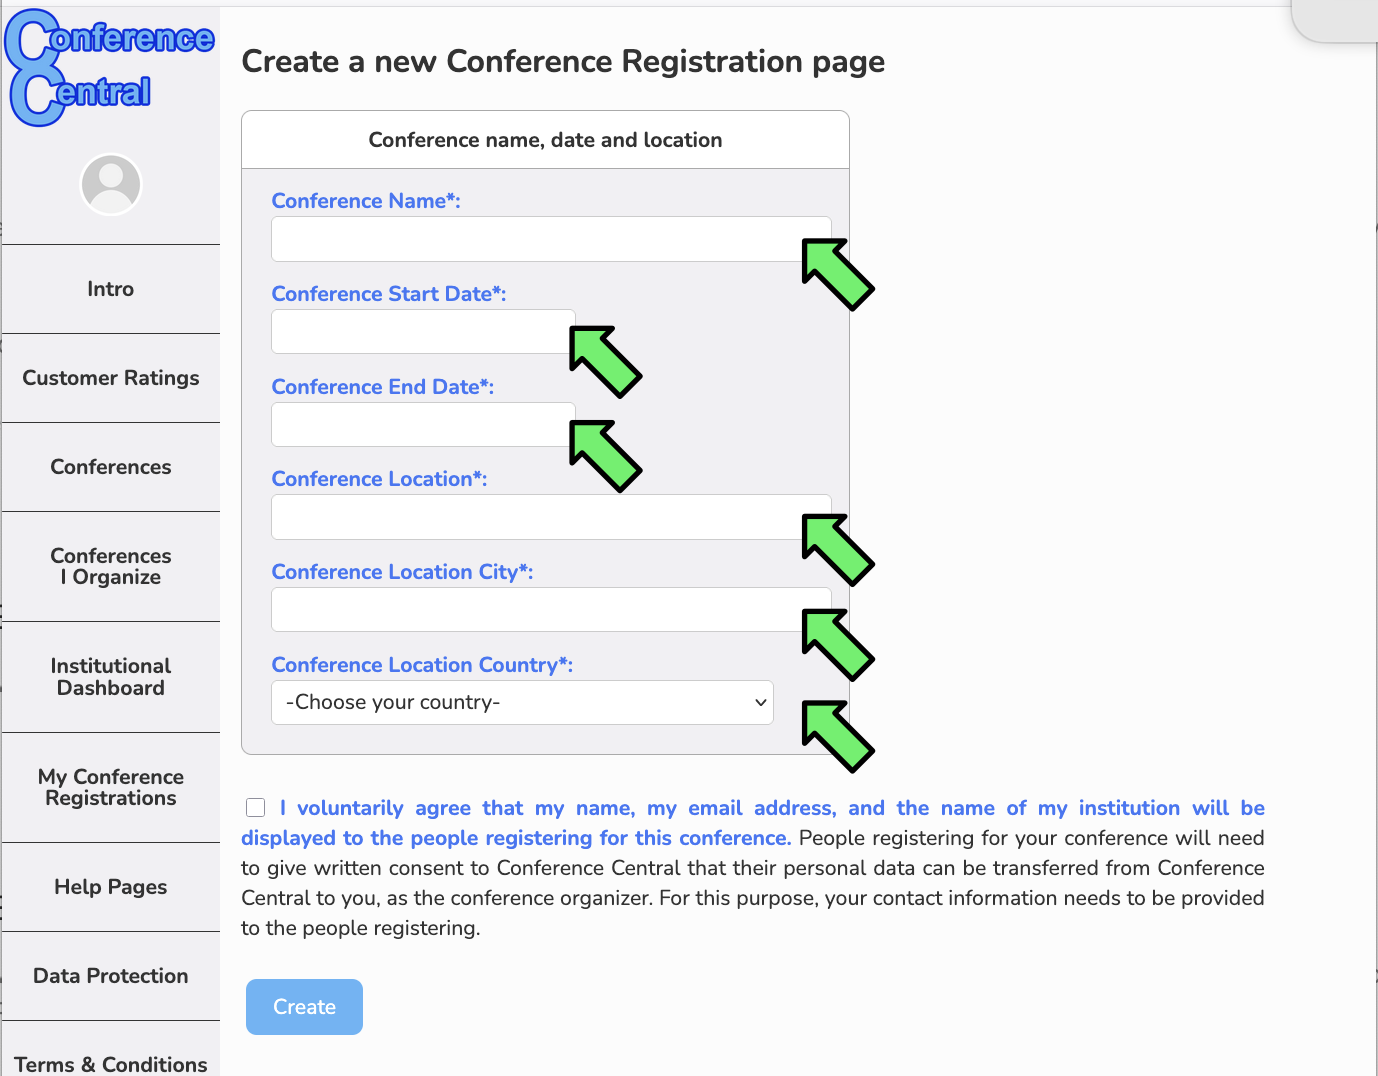
- Fill in the required basic information about your conference - conference name, start and end date of the conference, and information about where the conference will take place. Then click the checkbox that confirms that you agree that your name and email address get displayed to people registering for your conference, ance click "Create" at the bottom.
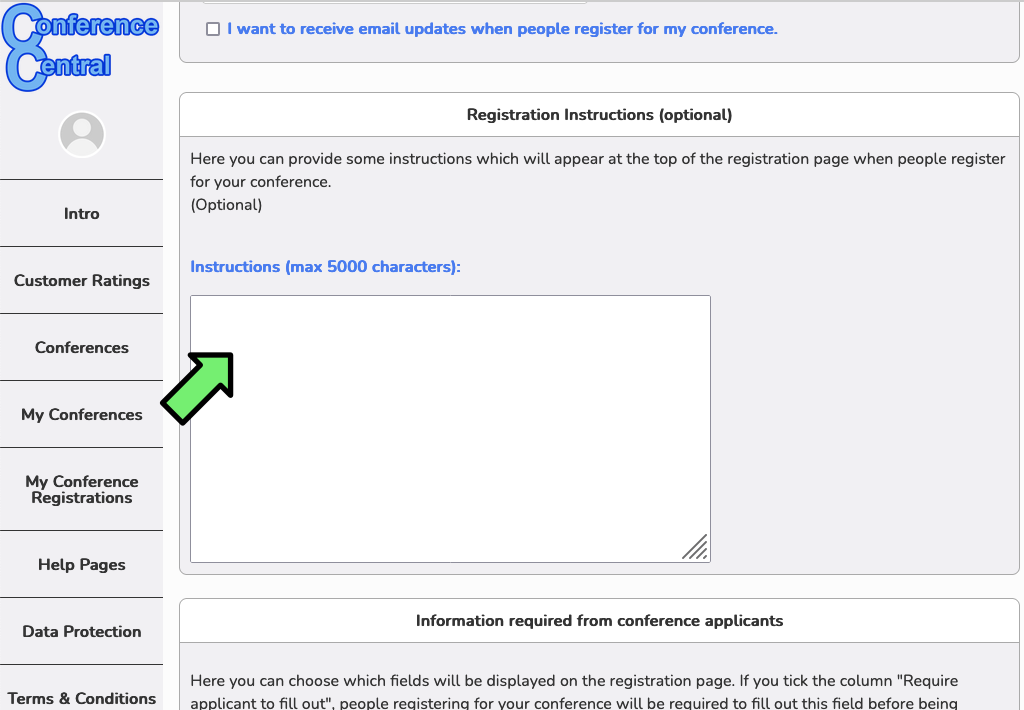
- Scroll down. The next optional field enables you to write some information that will appear at the top of the registration page when people register for your conference.
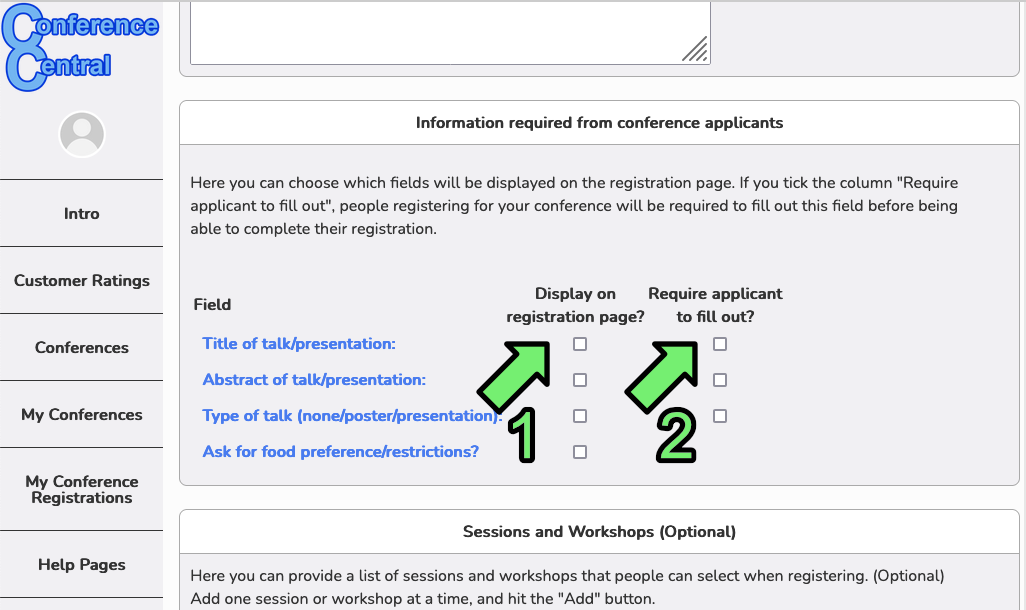
- Scroll down. Here you can select what information you want to collect from the people registering. For each item (talk title, abstract, etc) you can decide whether to show this field on the registration page or not (1), and whether to require the people registering to fill it out (2). If you click the first column but not the second column, that field will appear on the registration page, but will be optional - people will be able to register without entering information there.
- Scroll down to "Registration Fees". (1) If your meeting is free of charge, click on "Registration for the conference is FREE". You can then skip to the next step.
If instead you wish to collect registration fees, then finish filling out the information in this box.
(2) Select the currency in which you wish to collect your registration fees (EUR, GBP or USD).
(3) Select which registration categories you want to display on your registration page, and
(4) how much each category costs. Some preset categories are "Student", "Postdoc" or "PI", but there are also customizable categories that you can name as you wish. Note that in this case, ConferenceCentral.org will retain 2% of your registration fees to defray our running costs.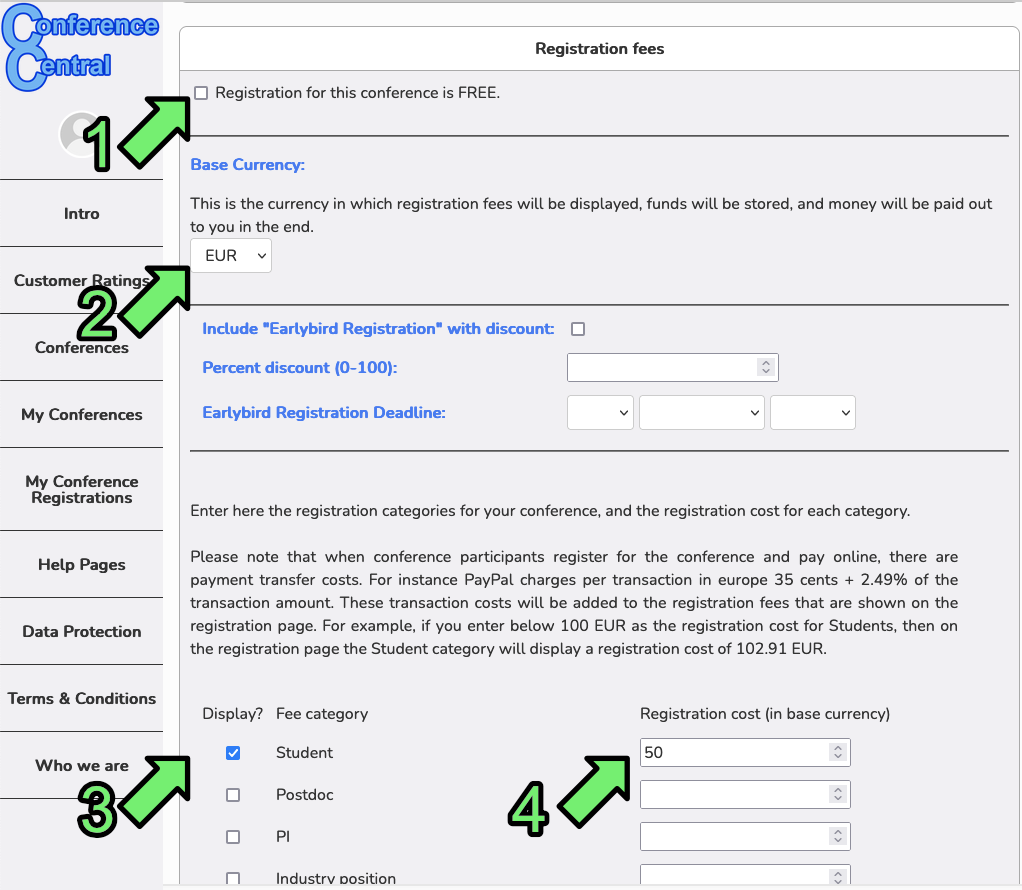
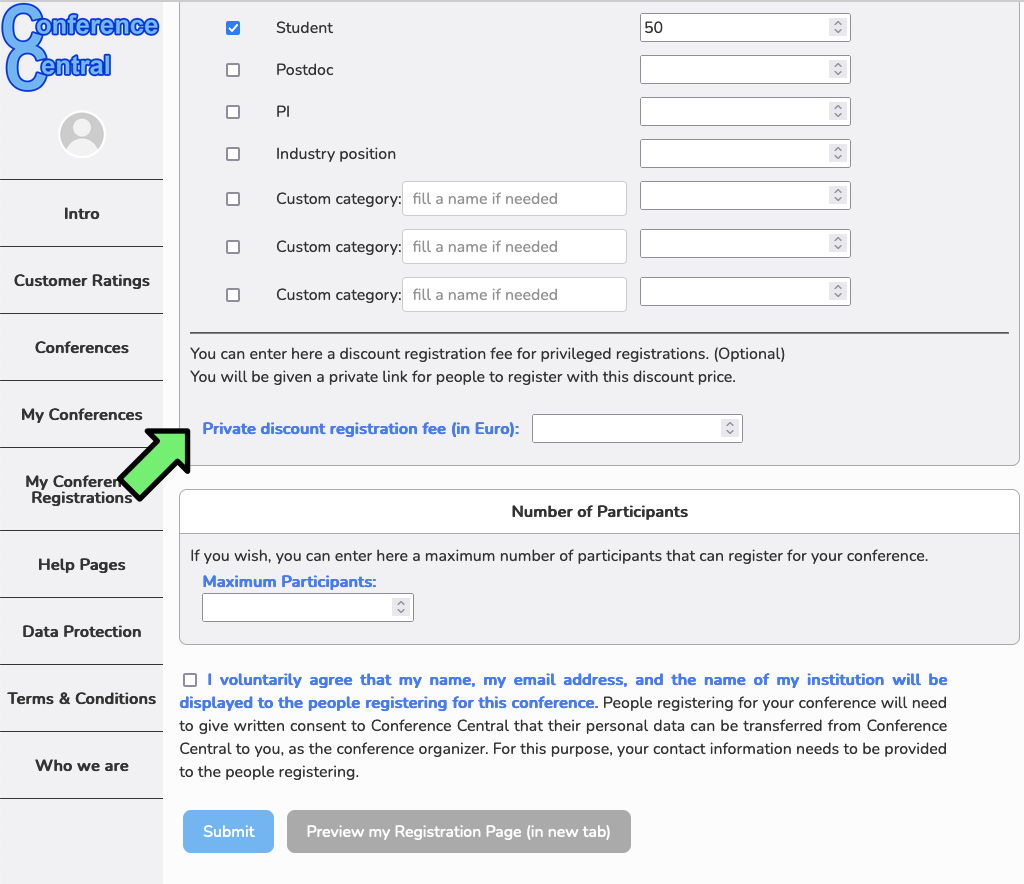
- If you wish to provide a discounted registration price to some of your guests without everyone else seeing this, you can enter here a discount registration fee. You will then be provided a private registration link to send to your special guests.
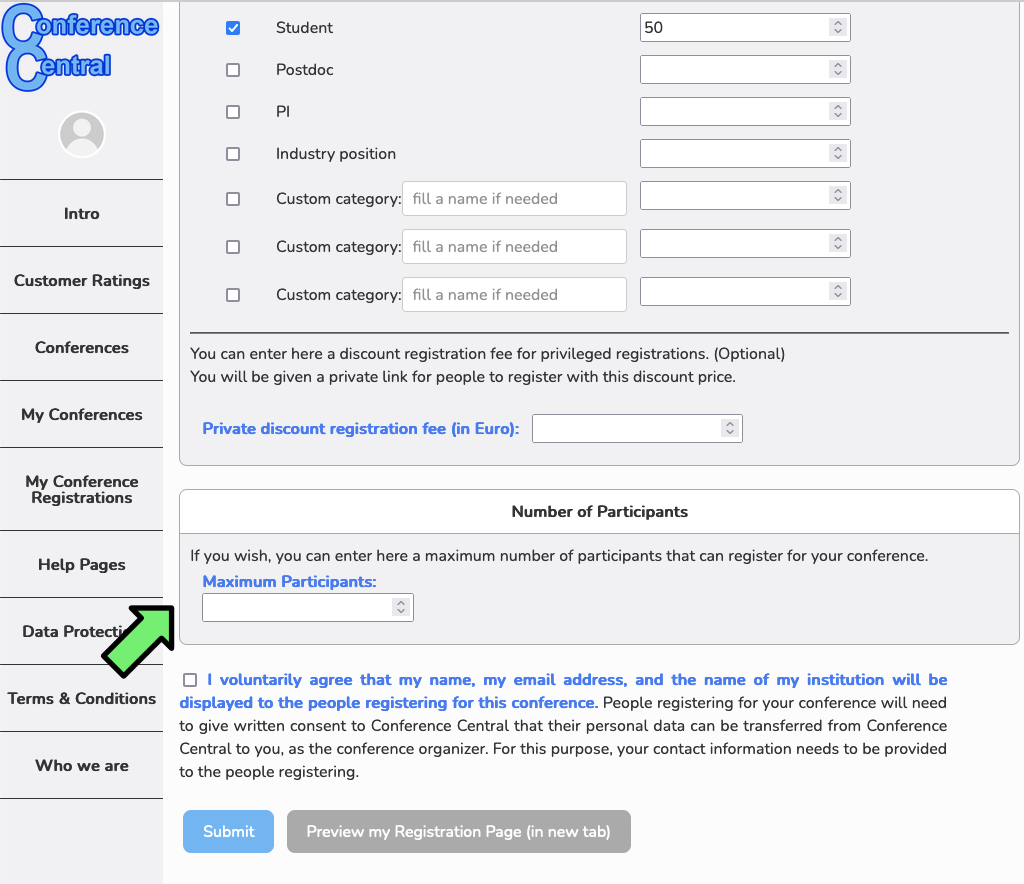
- Enter a maximum number of participants allowed to register for your conference.
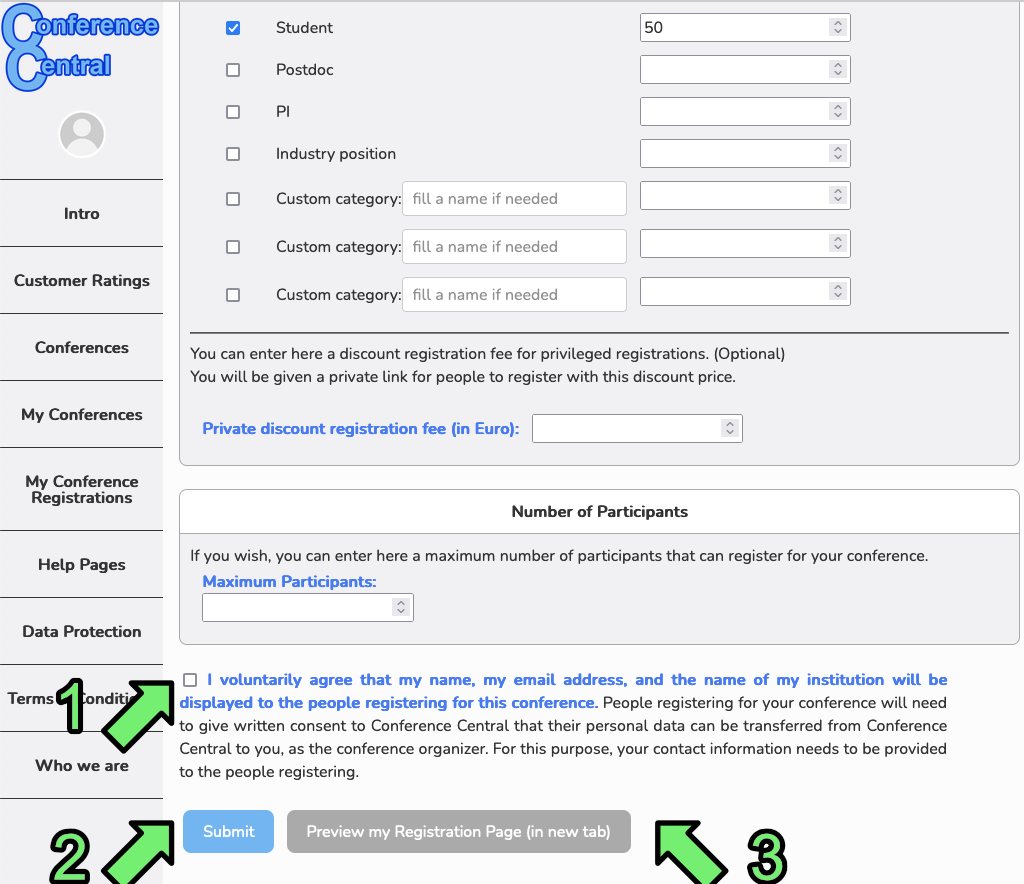
- Finally, (1) click on the check box to agree that your name and address will be provided to the people who are registering for your conference, and (2) click Submit. If you wish, before submitting, you can click on (3) "Preview My Registration Page". A new tab or a new window will appear and you can see what your registration page will look like !
- Done ! Your registration page is ready ! Click on "My Conferences" in the menu bar and you will see it in your list of conferences and registration pages. Click on it to see details.

- The following screen snapshots show you information about your registration page and who has registered for your meeting.
The first box "Activity State" allows you to determine whether your registration page is open or closed for registrations. When you are ready to receive registrations, click to open it. If you have received enough registrations, click to close it. The registration page will automatically close for registration on the day of your meeting.
In this control box, you can also determine whether you want to receive email updates when people register for your meeting, and you can edit or delete your registration page.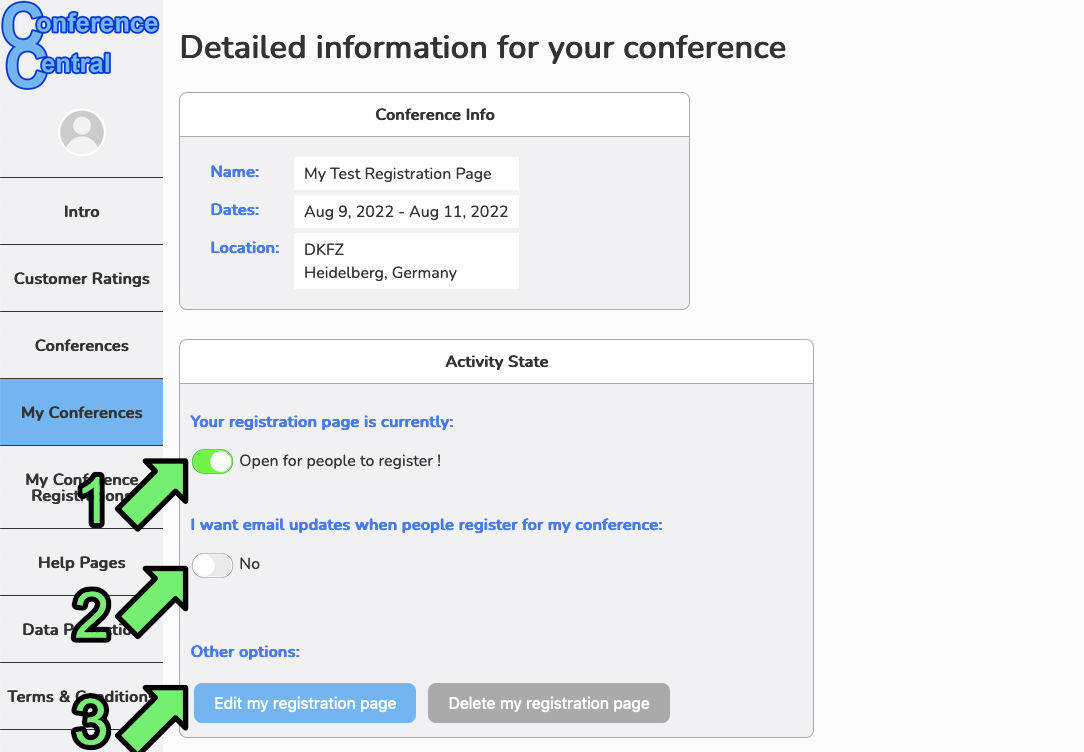
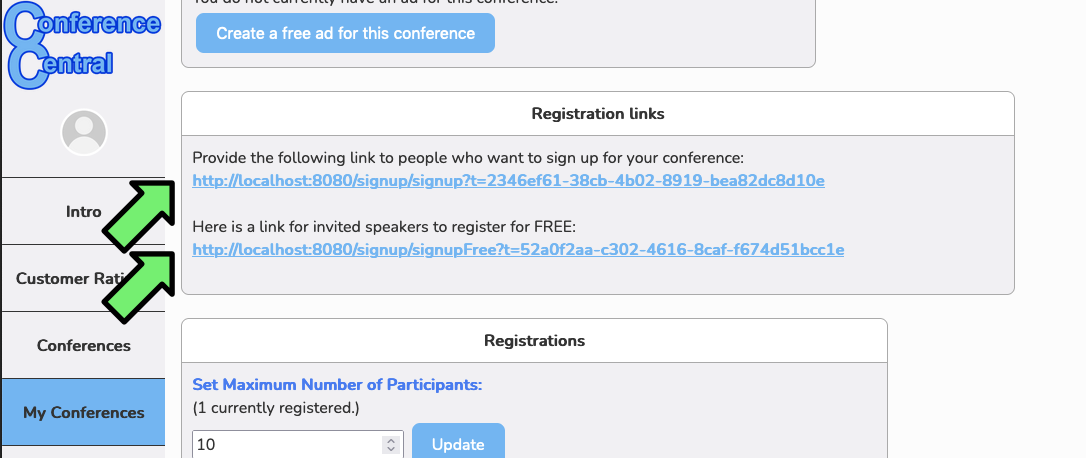
- The next section provides you with private links that you can send to the people you want to register for your meeting. Two links are provided - one link for the standard registration page, and one link for people to register for free (e.g. invited speakers).
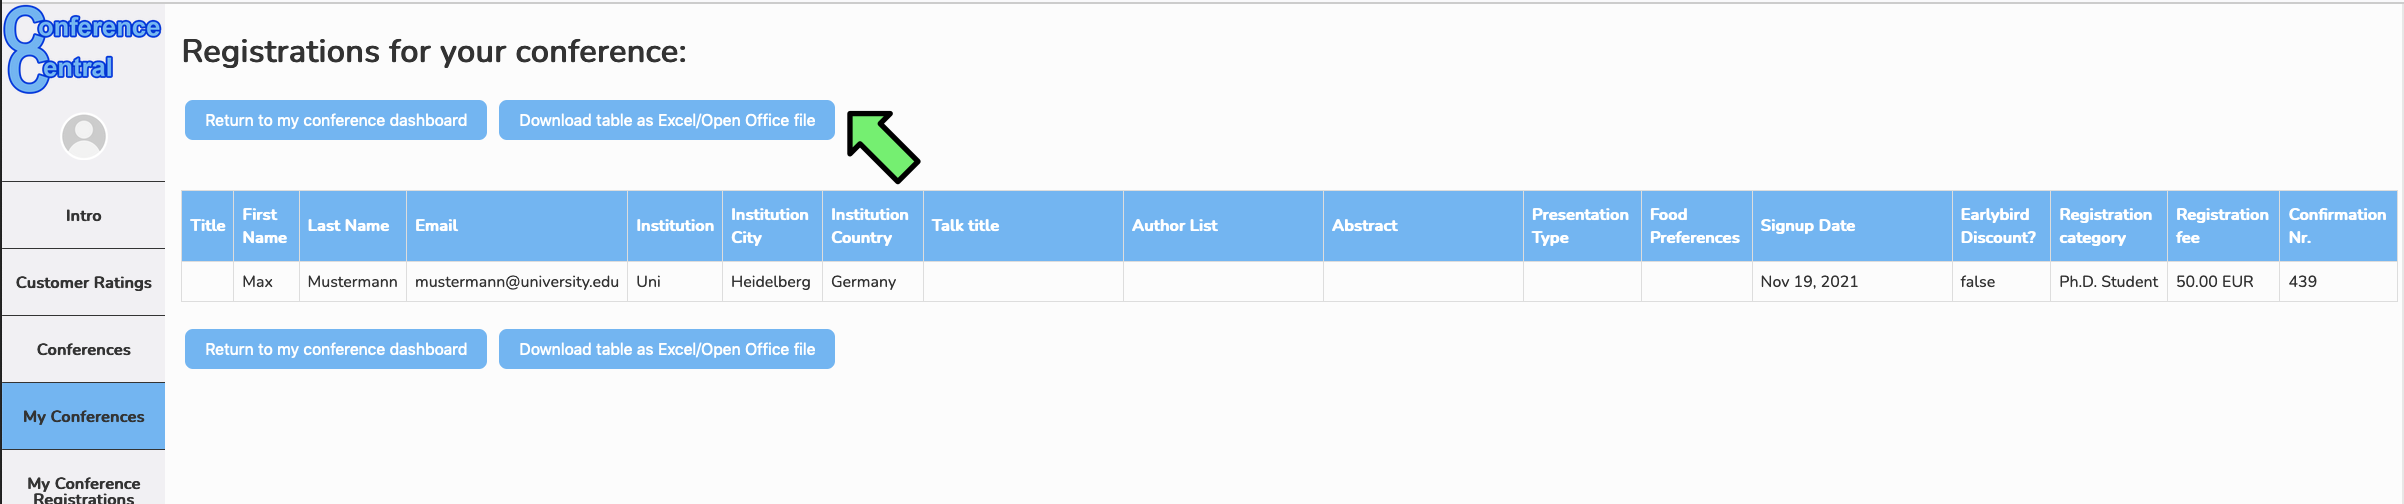
- The following "Registrations" section gives you an overview (1) of all the people that have registered thus far for your meeting. By clicking on "See list of registrations & details" (2) you will get details of all the registrations, and a link to download everything as an excel sheet.

- The "details" page shows you all the registration information in table format, which can be downloaded as an excel sheet by clicking on "Download table as Excel/Open Office file".