How to set up a webpage for your conference
Follow these steps to create and publish a full conference webpage with registration.
-
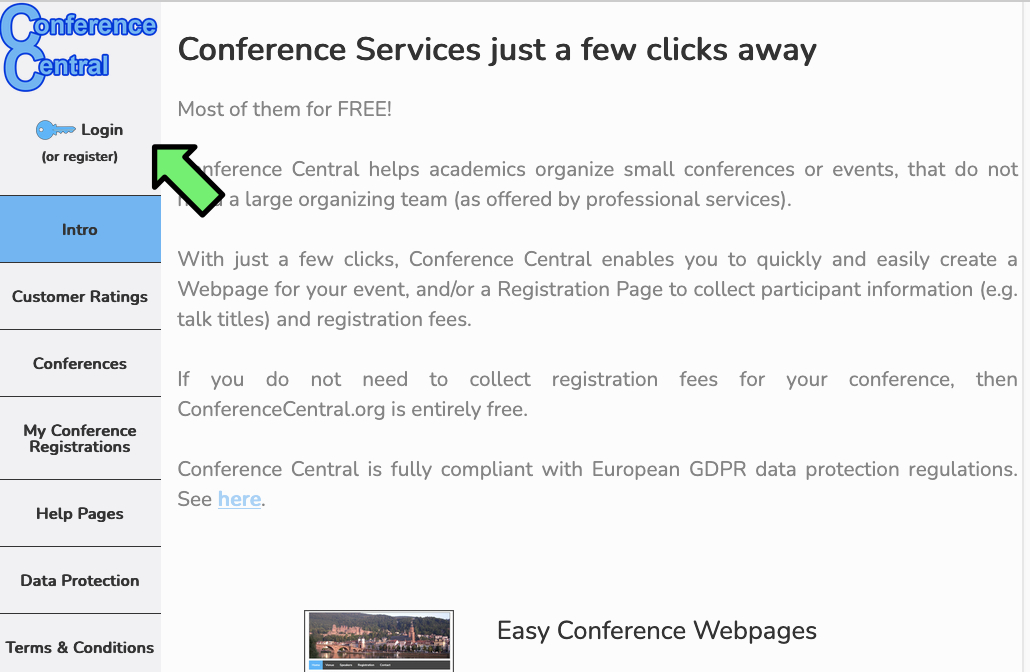
Login to your account.
-
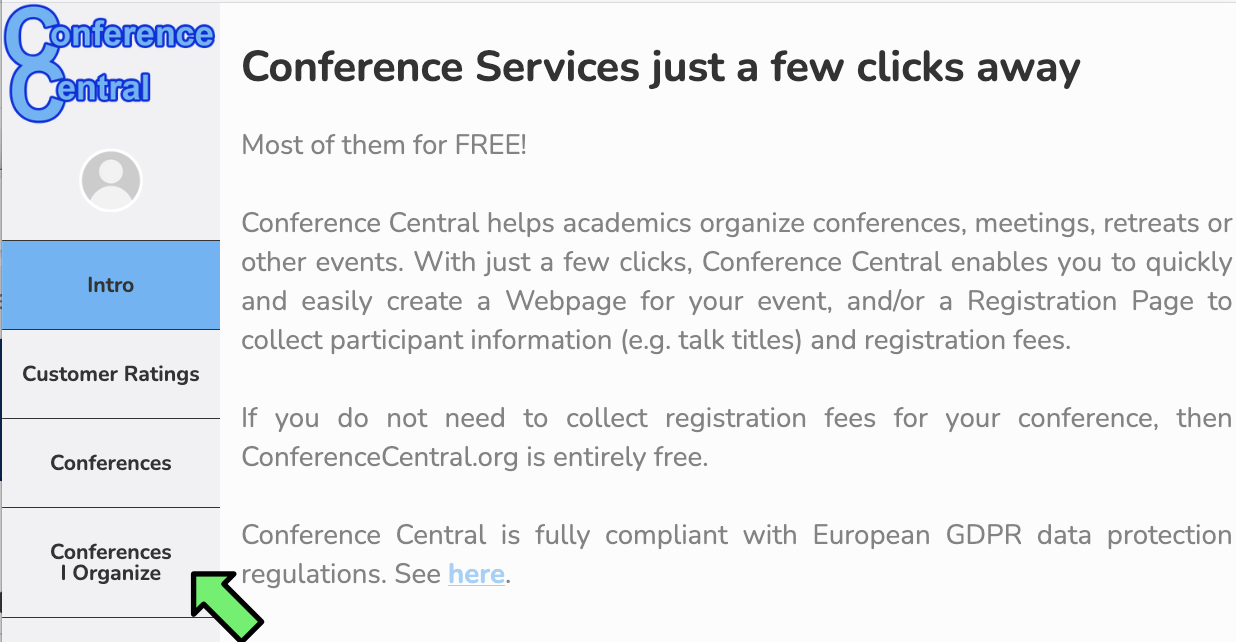
Click on "Conferences I Organize".
-
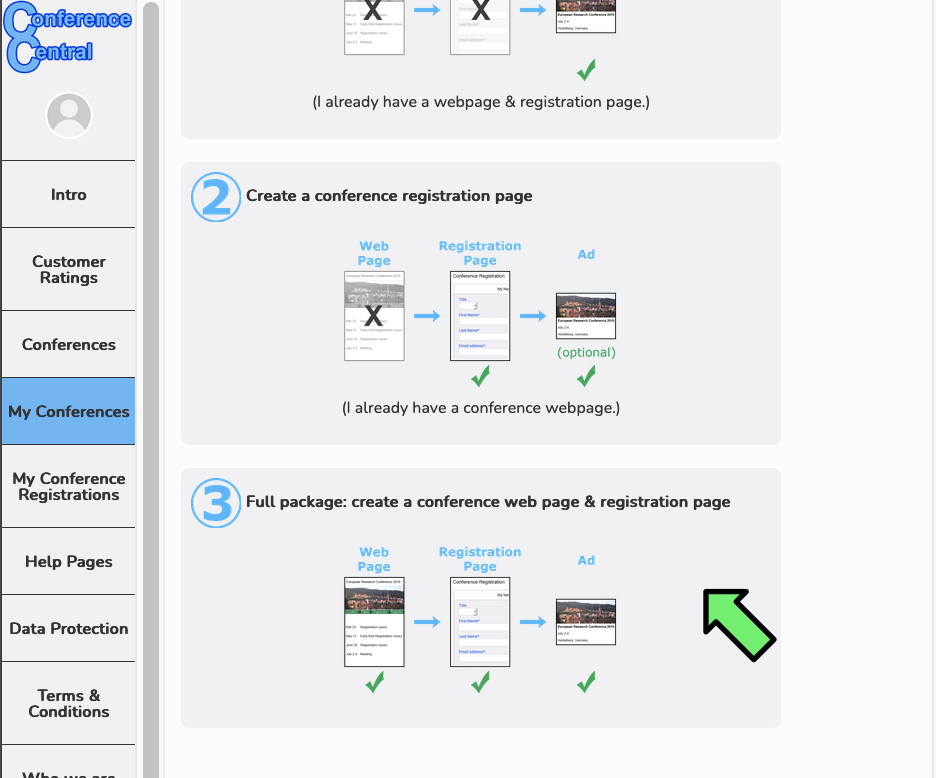
Scroll down and click on "Full Package: create a conference web page & registration page".
-
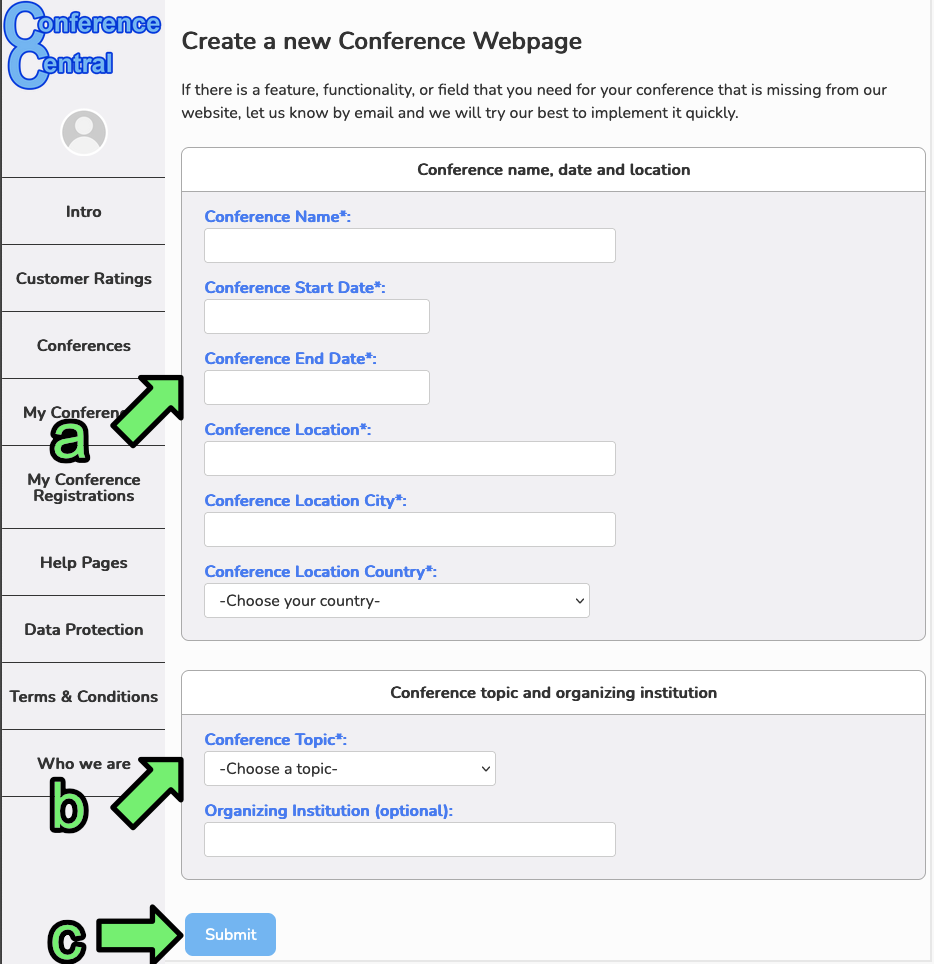
(a) Fill in the basic information for your conference (name, location, and date).
(b) Choose the general topic (e.g. Biology, Chemistry). The conference will be listed under this topic in the "Conferences" menu.
(c) Click "Submit".
-
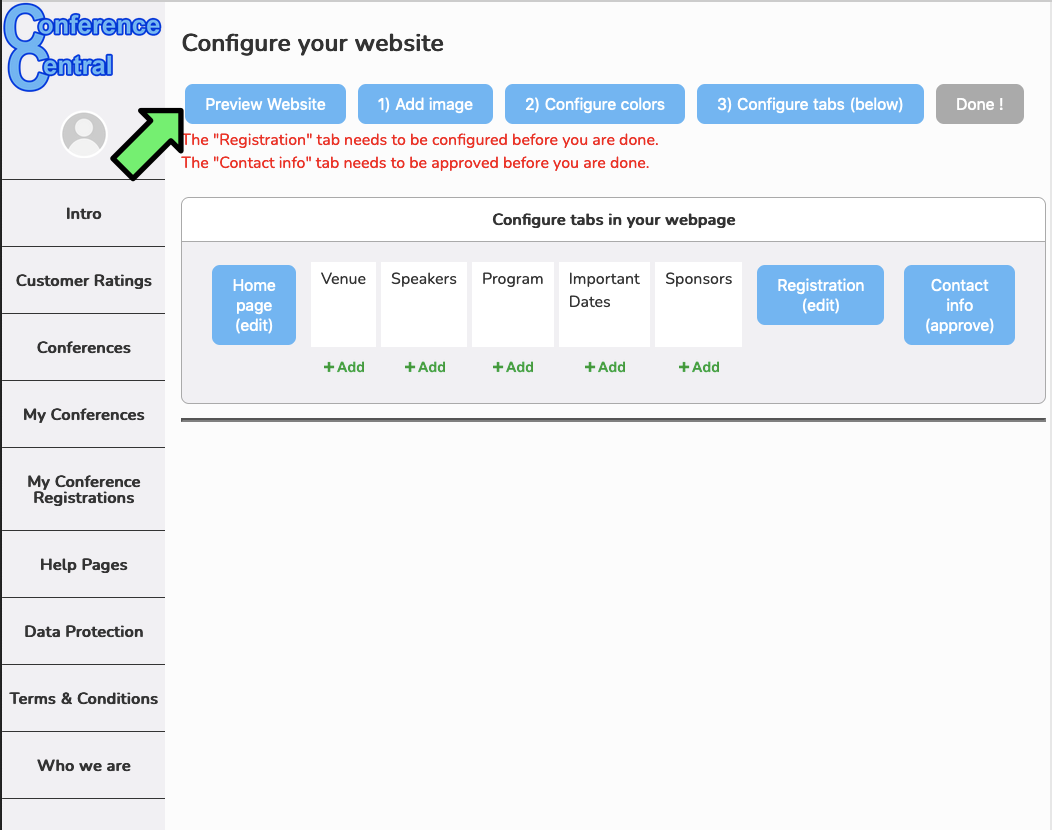
This is the main page where you edit your website. Start by clicking "Preview Website".
-
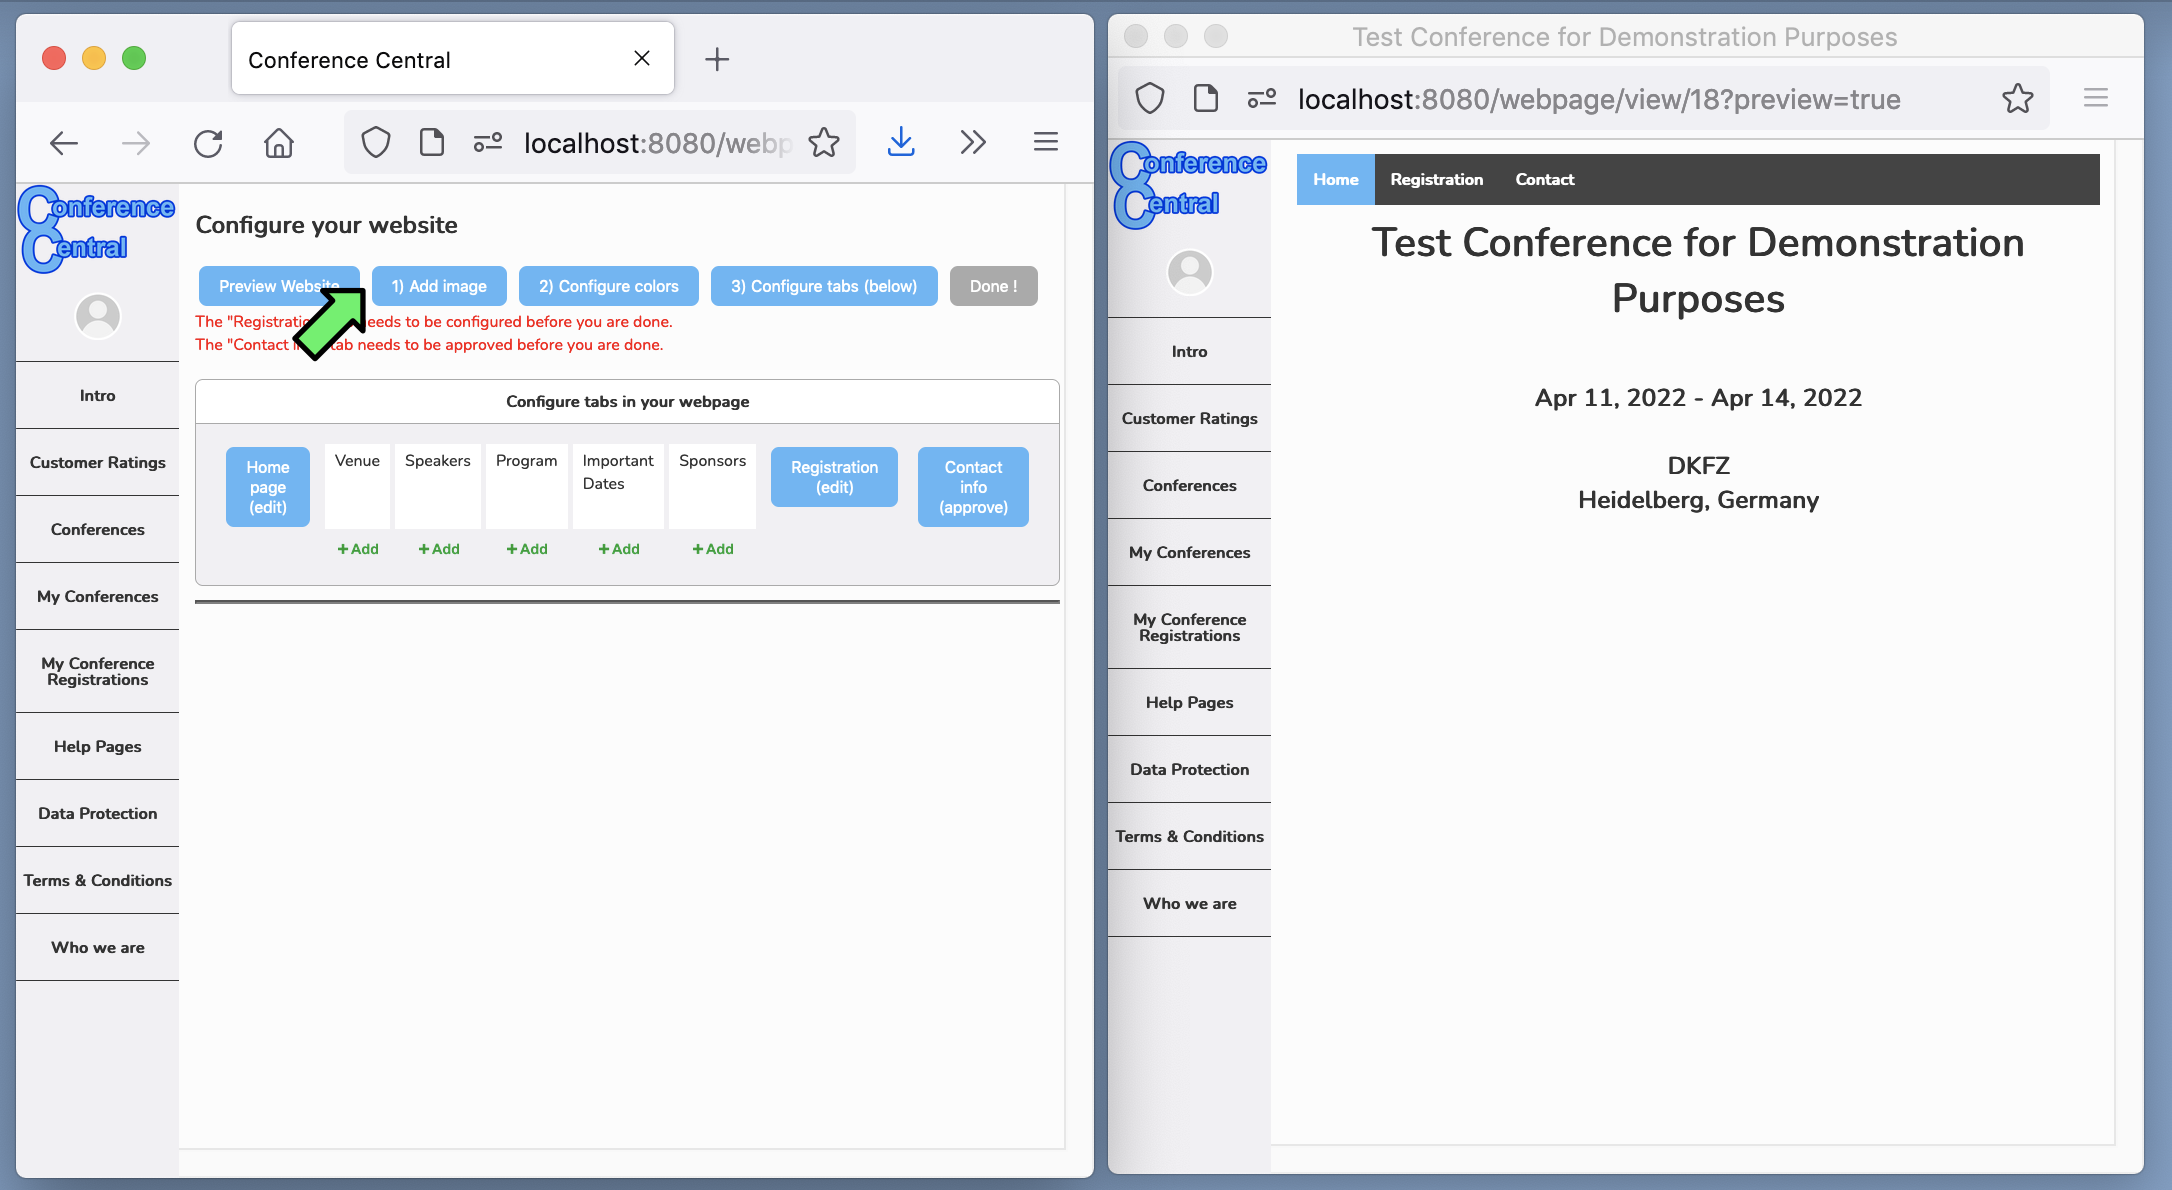
A preview of your conference webpage opens in a new window. The name, location and date are already visible. We'll start by adding an image — click "Add Image".
-
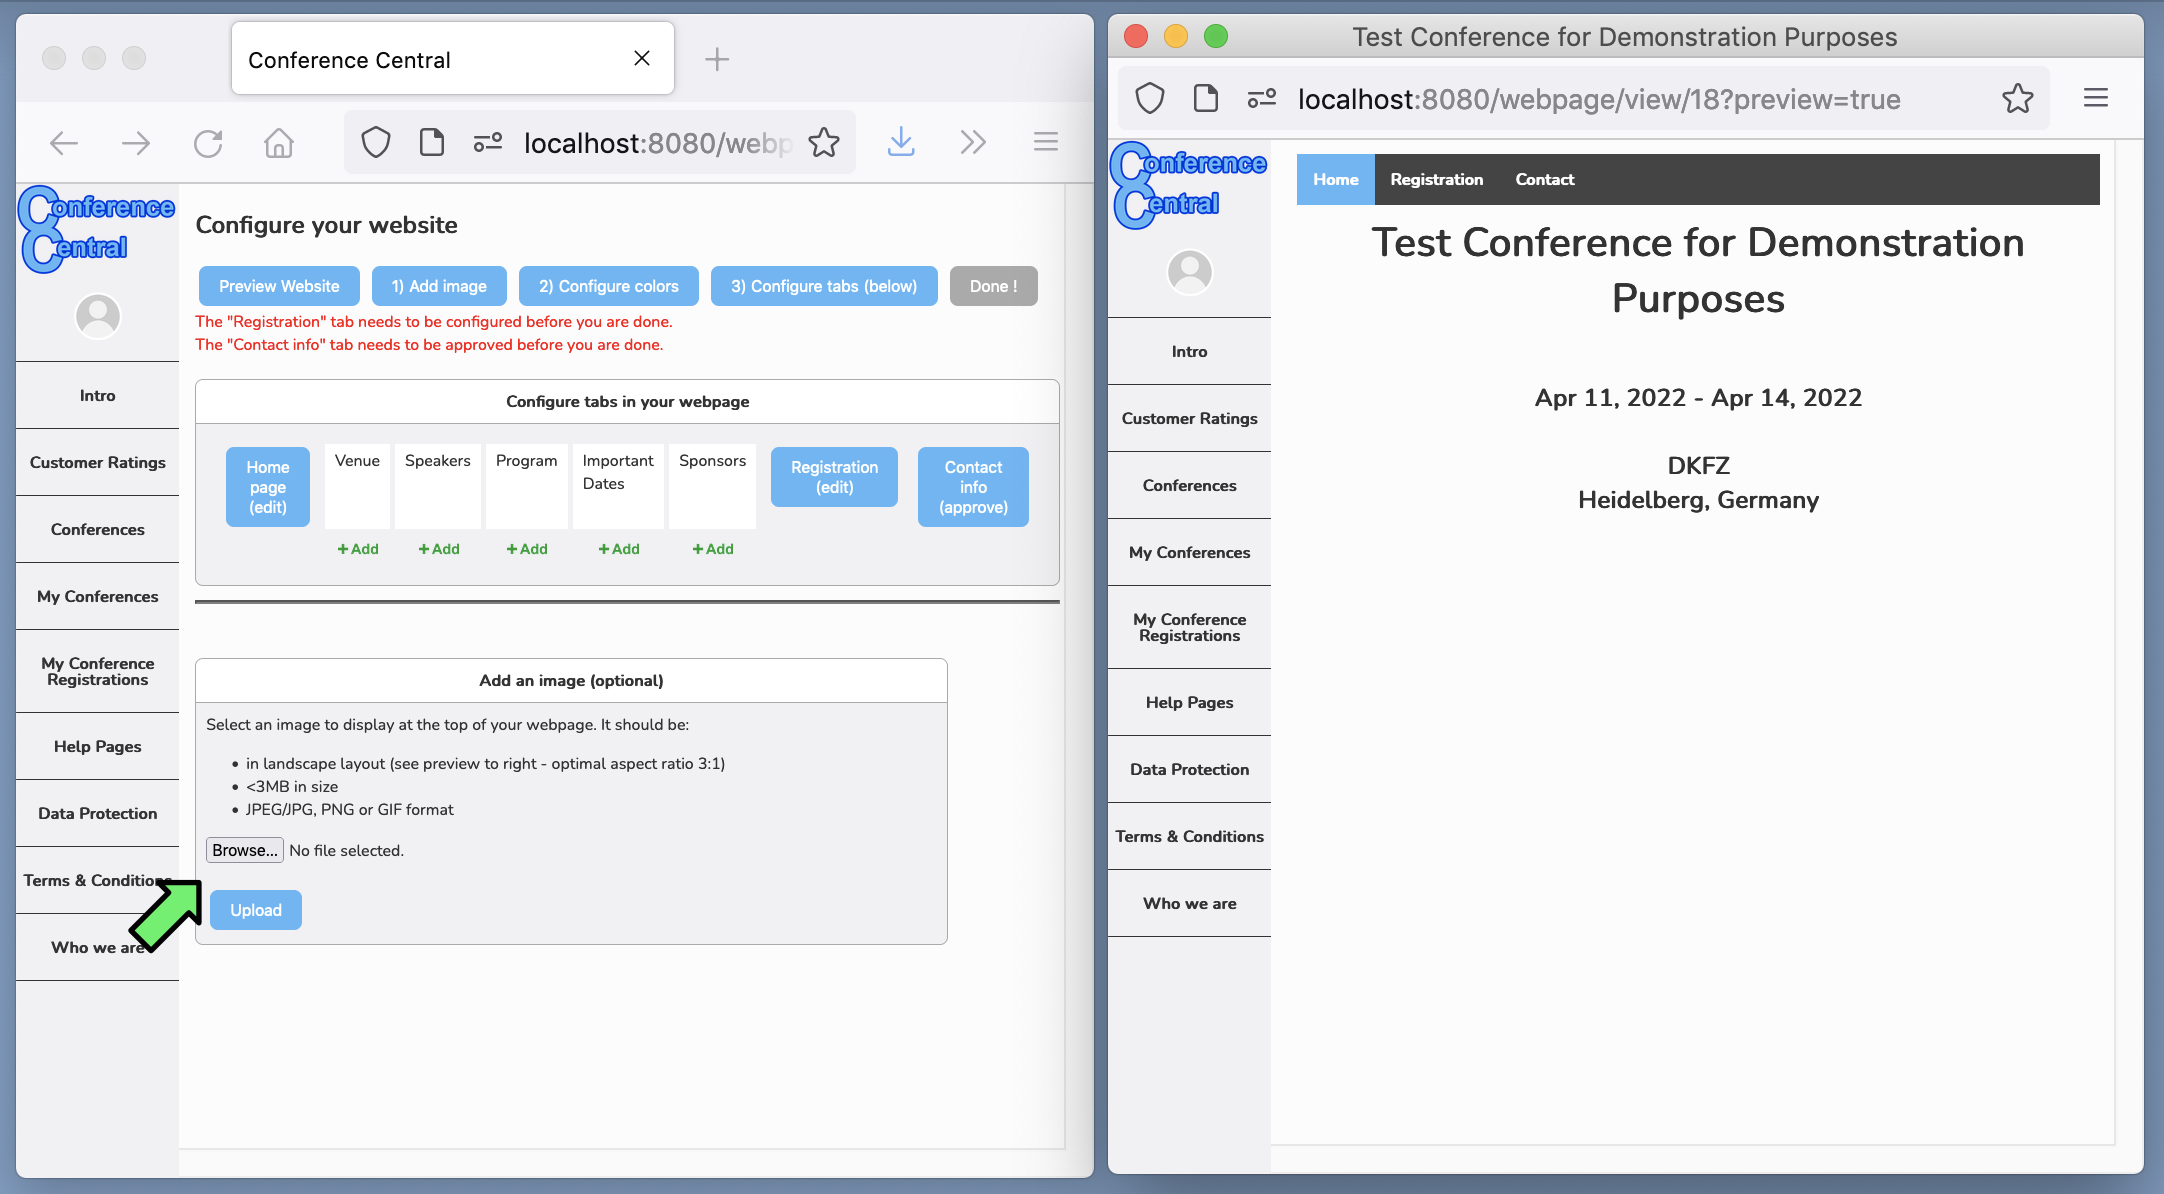
Select an image file and click "Upload". A wide image works best.
-
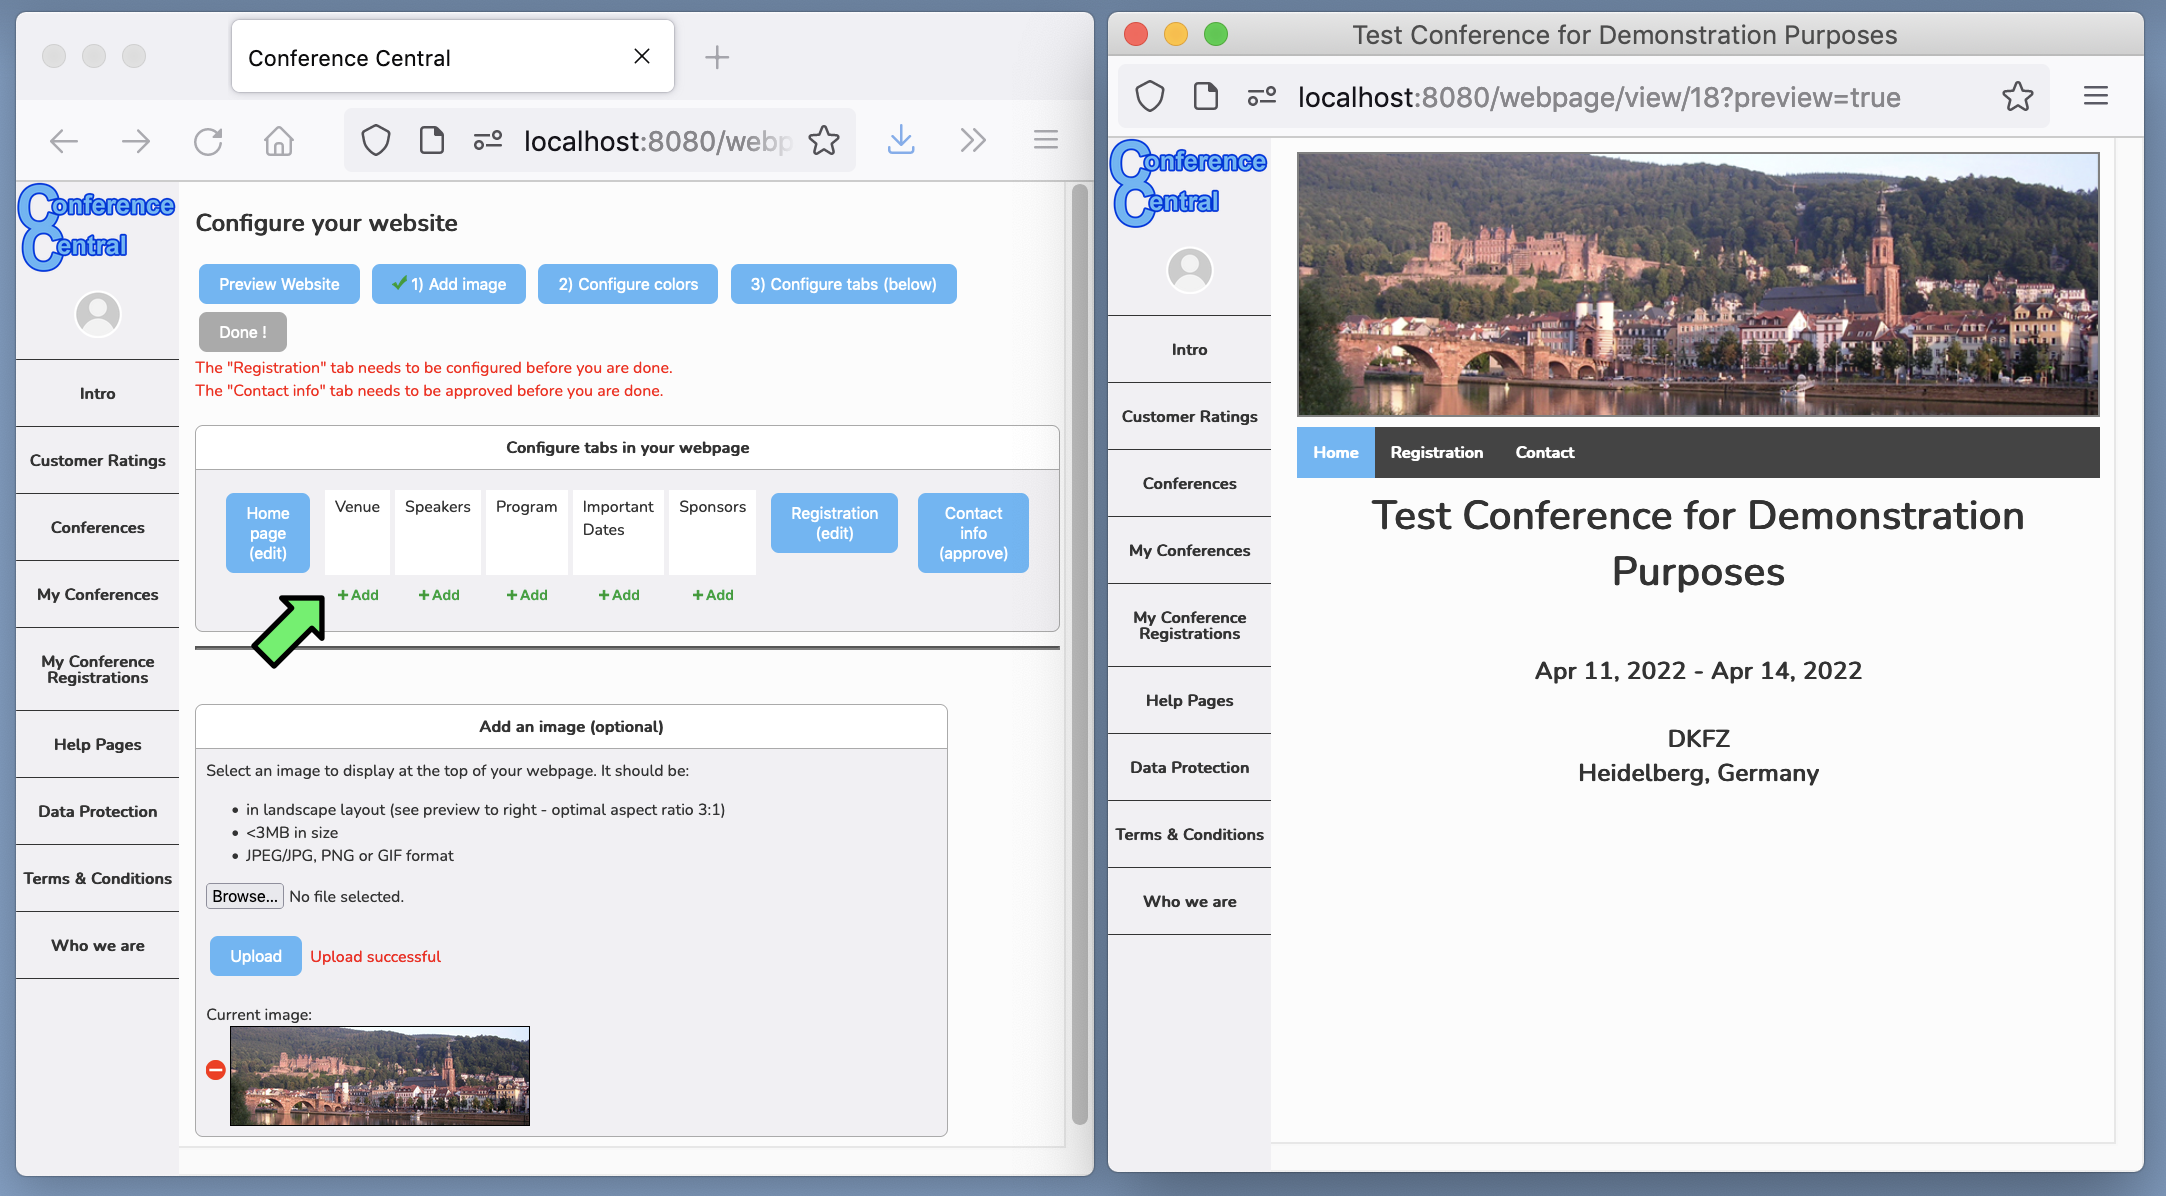
Your page already looks better — there's now an image at the top.
Optional: To change the background or font colour, click "2) Configure Colors".
Your page currently has three menu items: Home, Registration, and Contact. You can add more by clicking "+ Add" under the available tab options (Venue, Speakers, Program, etc.). For example, to add venue information, click "+ Add" under Venue.
-
In the box that appears, type information about your venue and click "Submit".

-
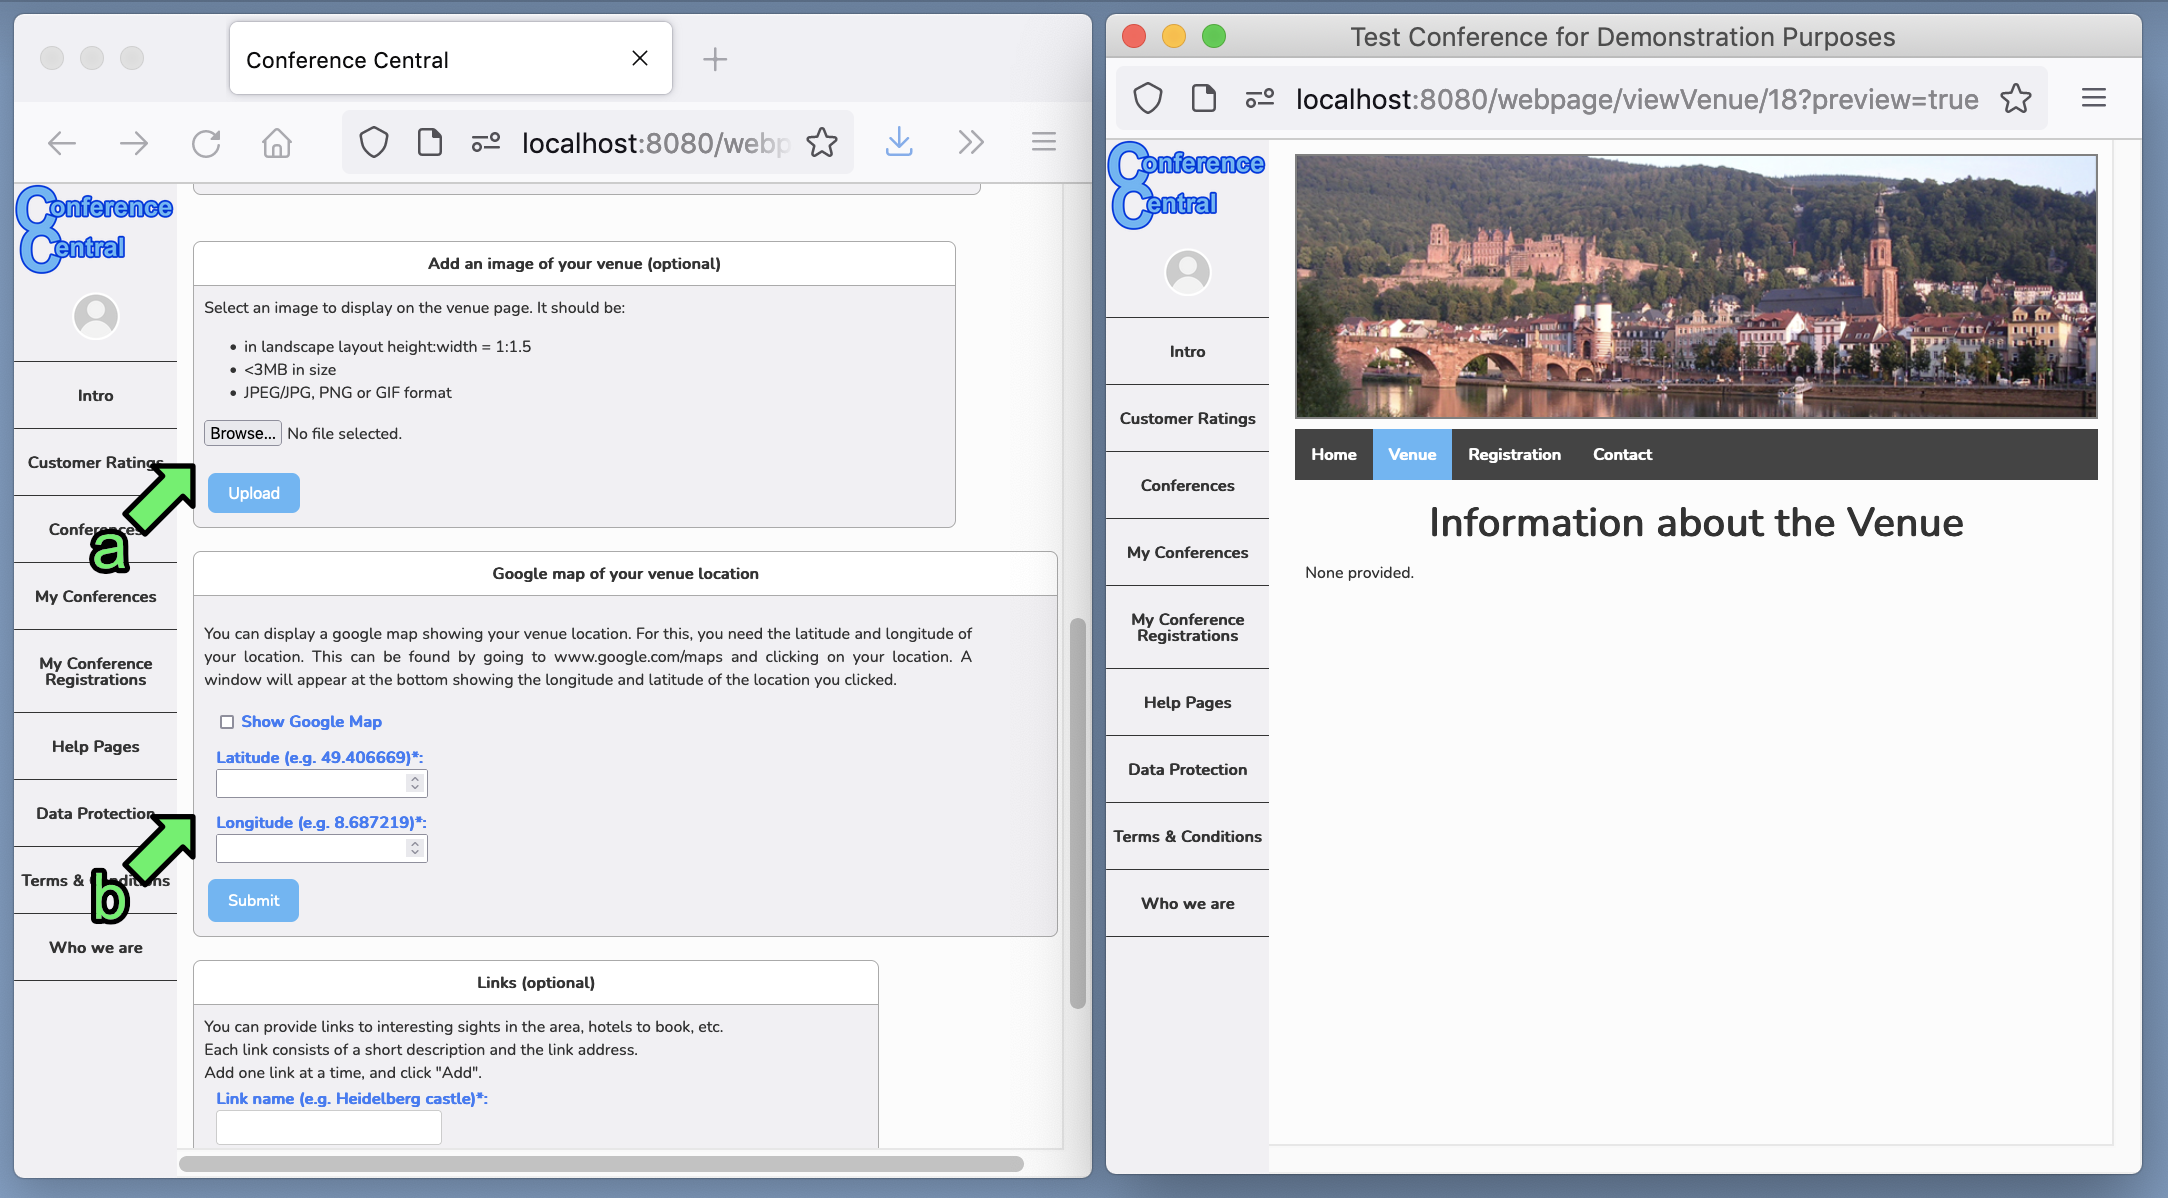
(a) Scroll down to add an image of your venue.
(b) If you enter the geographic coordinates and select "Show Google Map", a map of your venue will appear on the webpage.
-
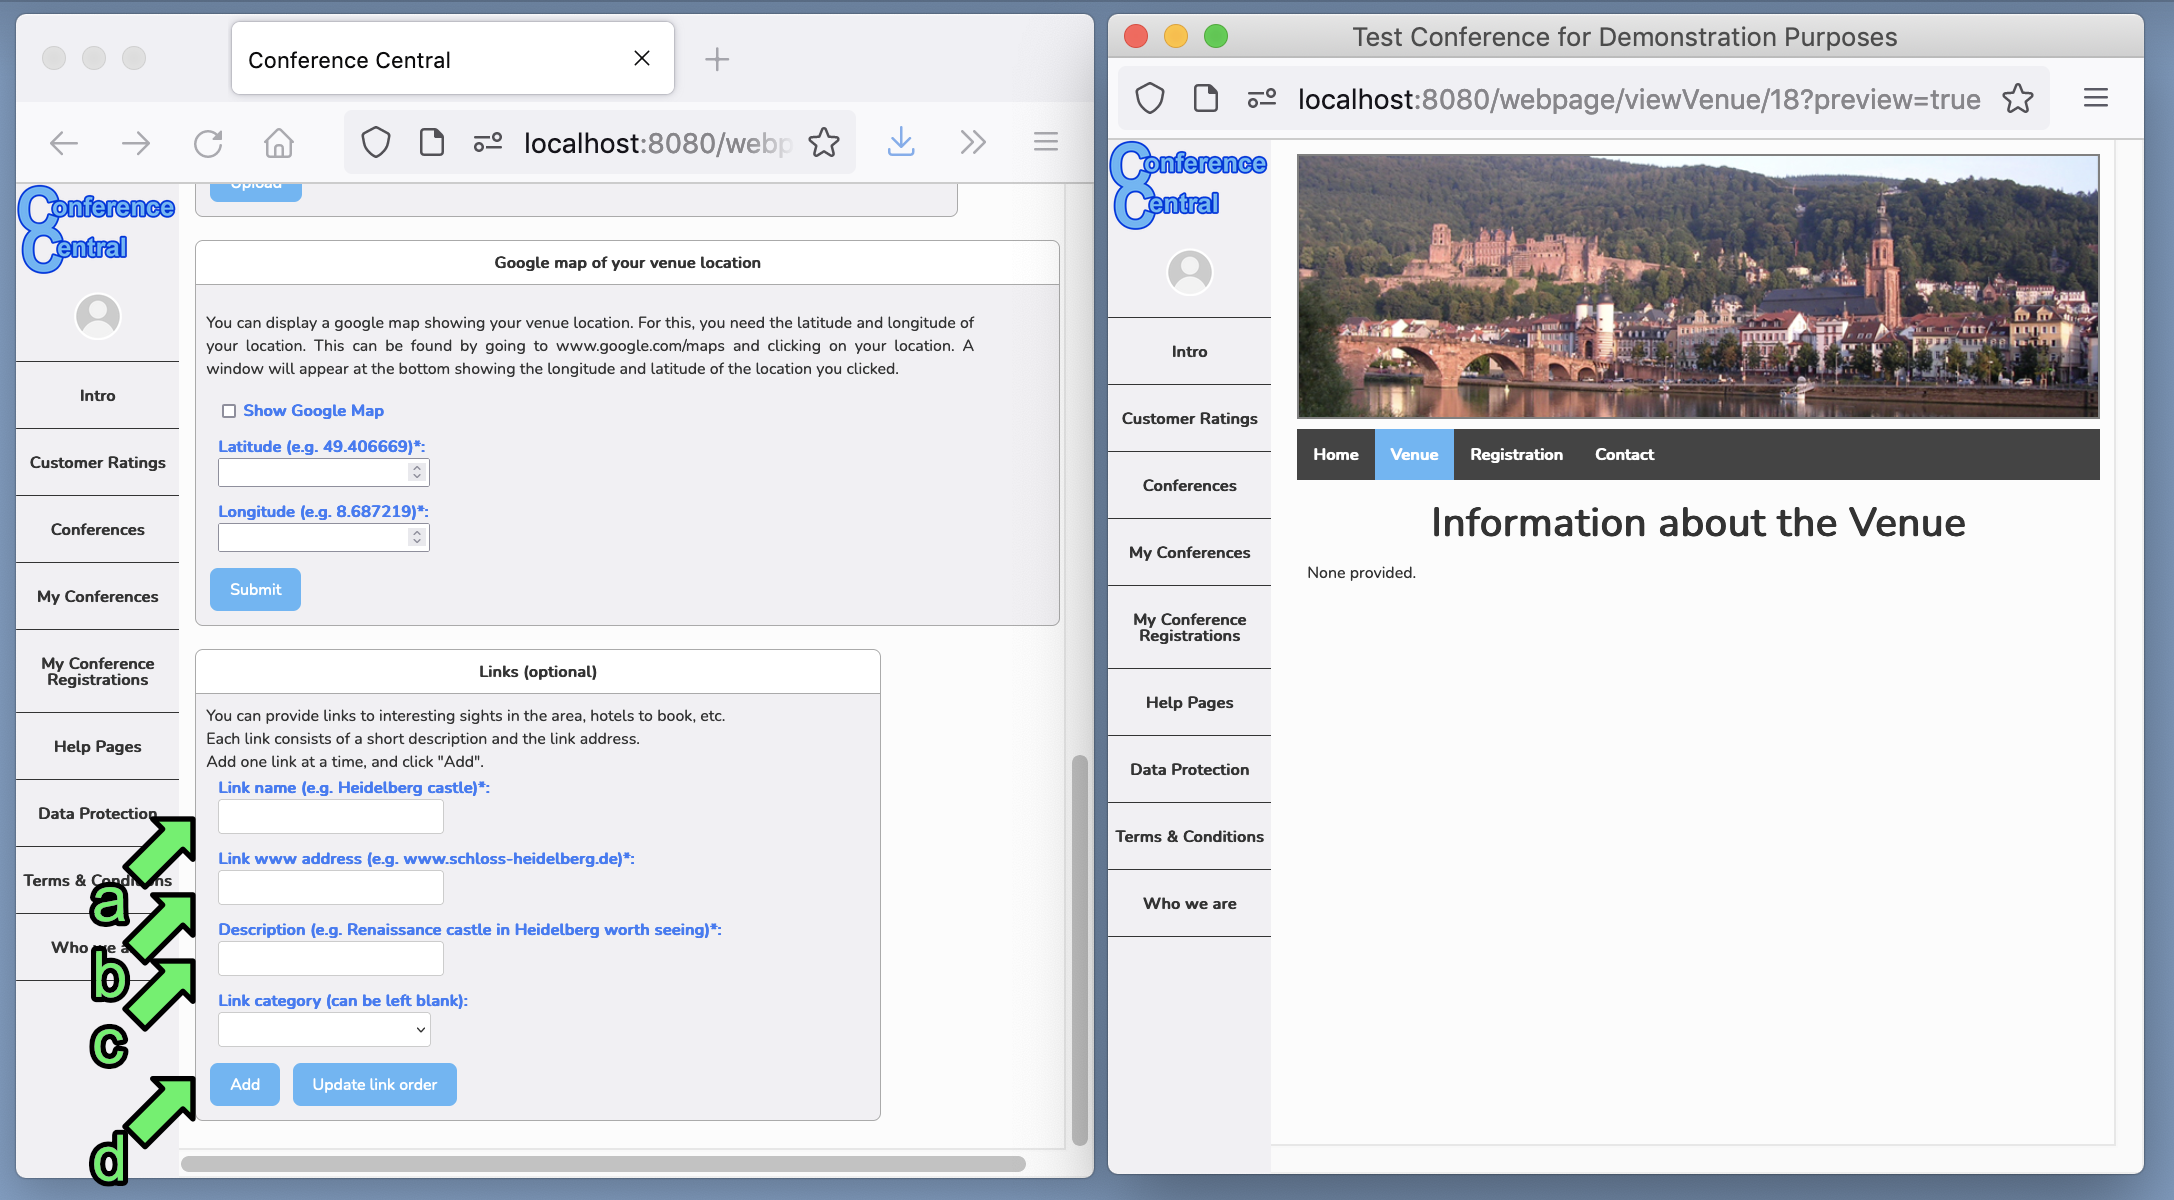
Scroll down further to add links — for example to nearby hotels, restaurants, or attractions.
(a) Give the link a name (e.g. "Crown Hotel").
(b) Provide the URL.
(c) Enter a short description (e.g. "Hotel nearby").
(d) Click "Add".
-
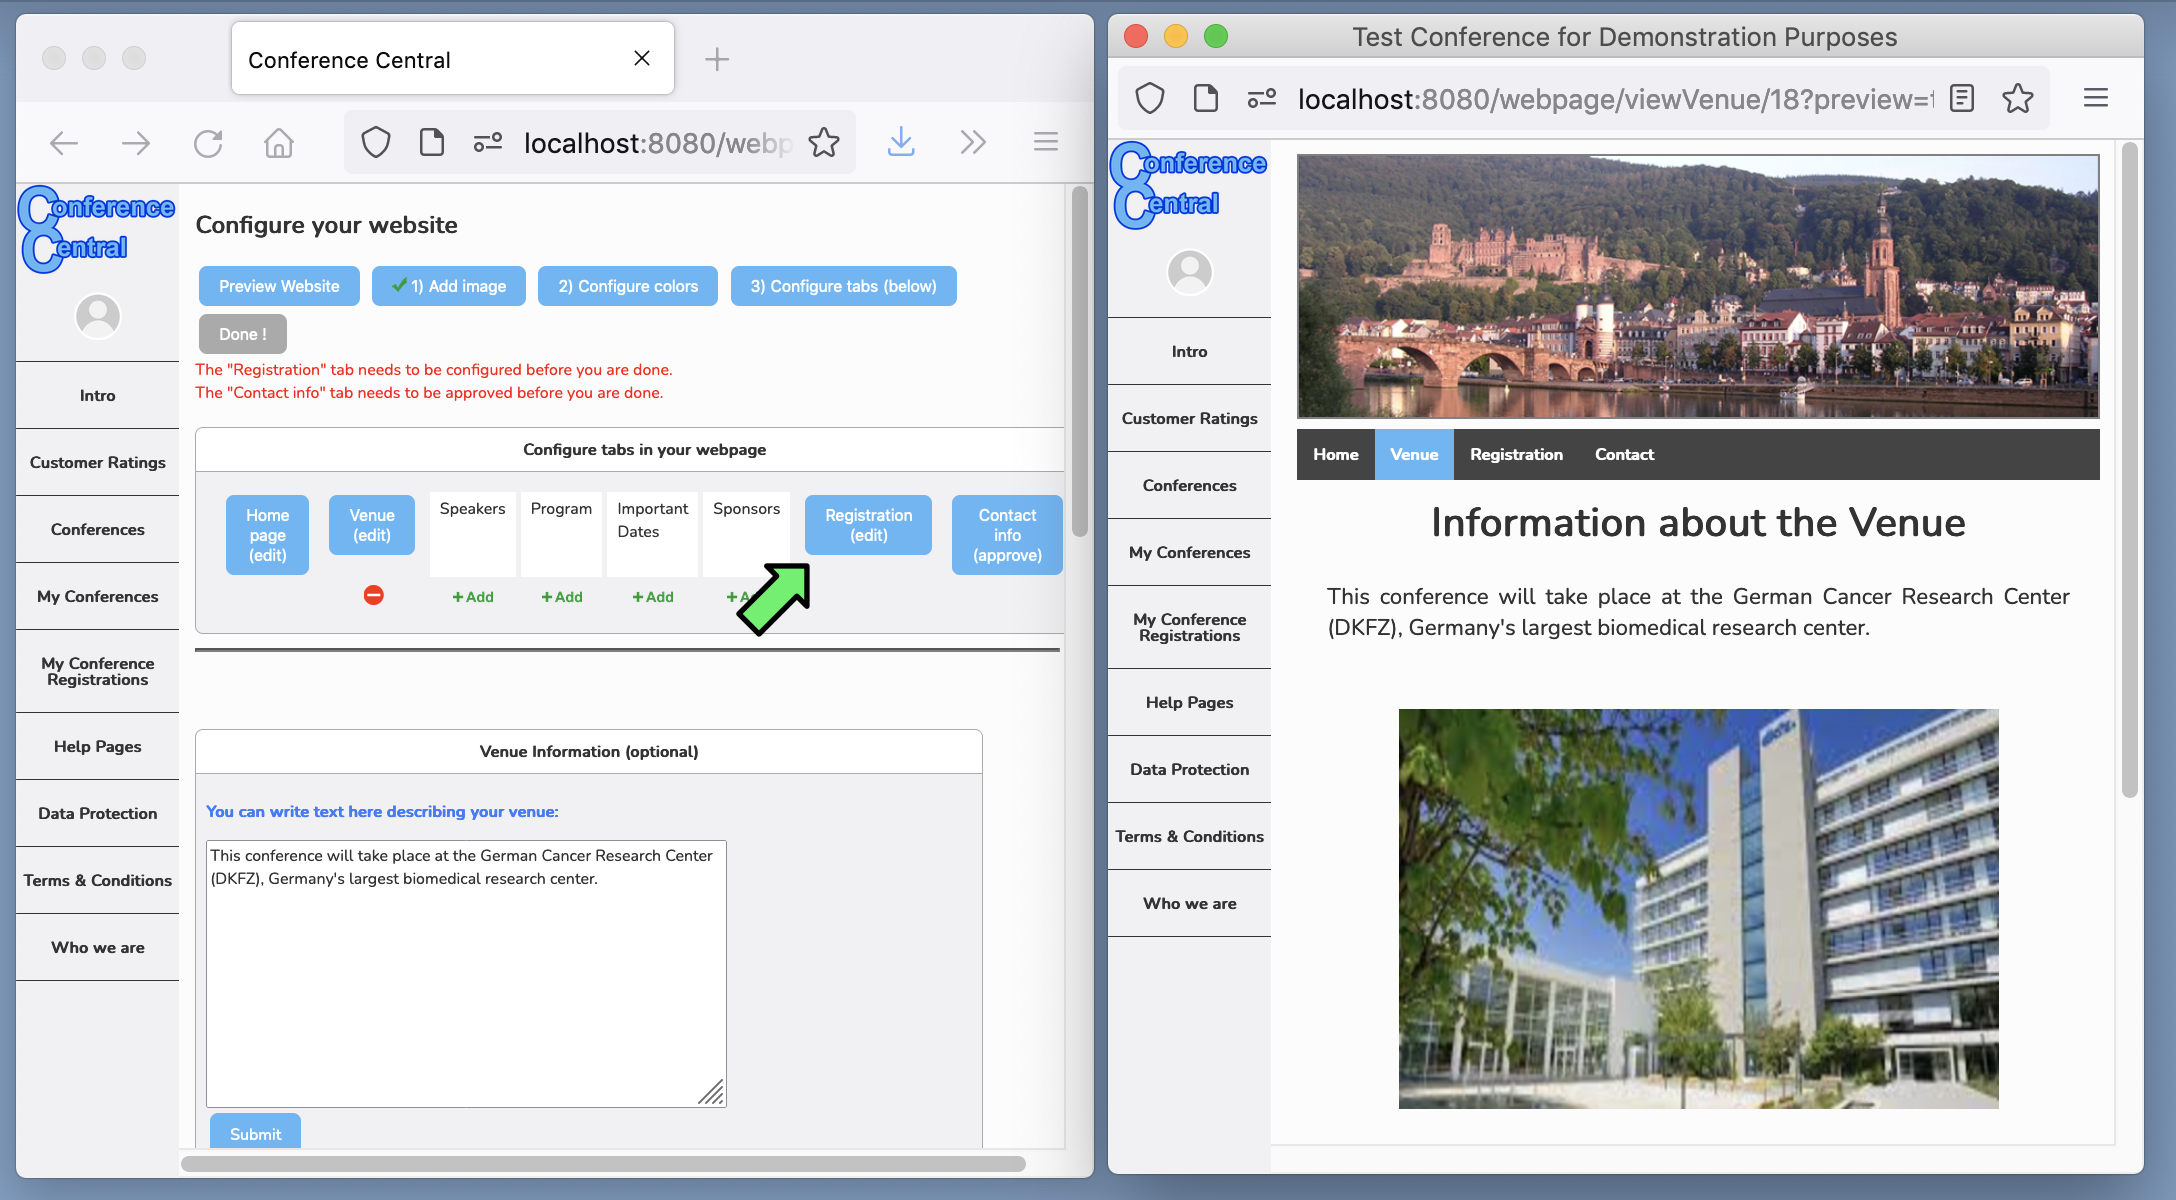
Your webpage will now look like this.
In the same way, you can add tabs for the programme, speakers, important dates, and sponsor logos. When you're ready to set up registration, click "Registration".
-
Select whether you want to receive daily summary emails listing new registrations.

-
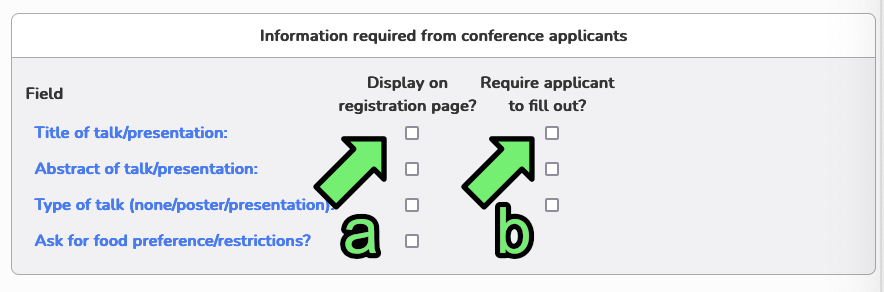
Scroll down to choose which fields to show on the registration form. For each item (talk title, abstract, etc.) you can decide whether to show it (a) and whether to make it mandatory (b). Showing a field without making it mandatory means it appears as optional.
-
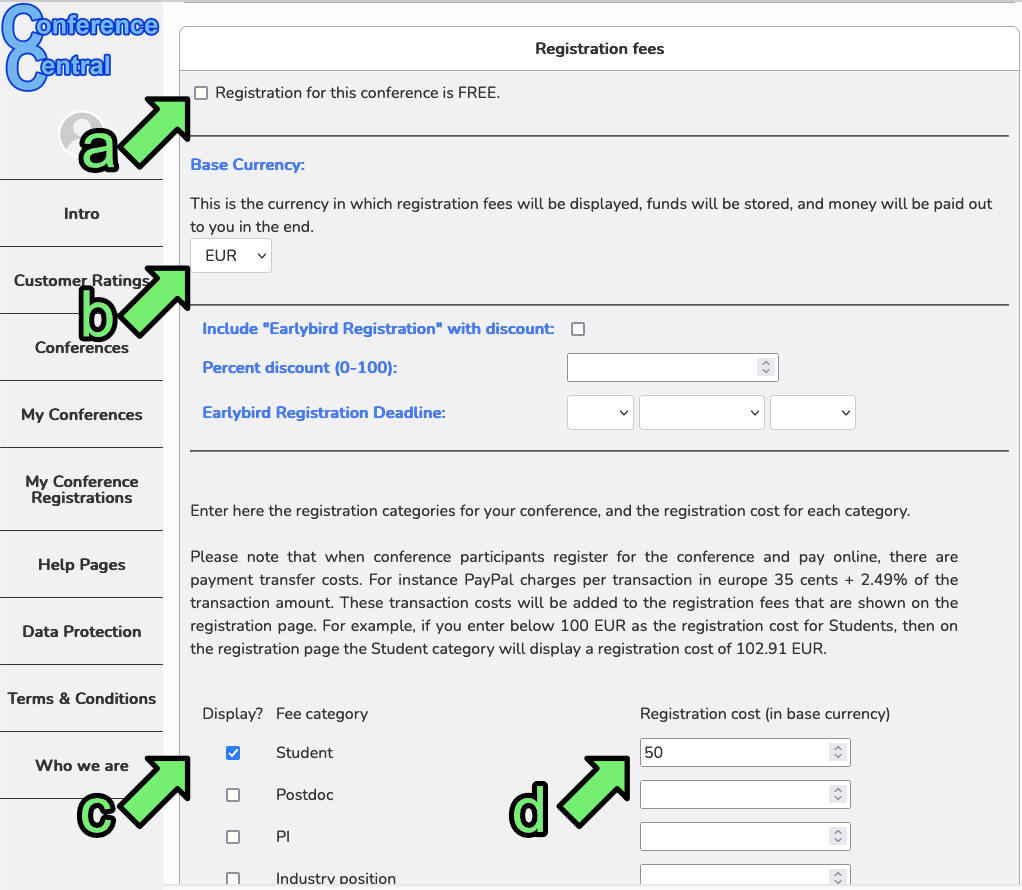
Scroll down to "Registration Fees".
(a) If your meeting is free, click "Registration for the conference is FREE" and skip to the next step.
If you wish to collect fees: (b) select the currency in which you wish to collect your registration fees (EUR, GBP or USD). (c) select the registration categories to display (Student, Postdoc, PI, or custom); (d) set the price for each category.
Note: Conference Central retains 2% of registration fees to cover running costs.
-
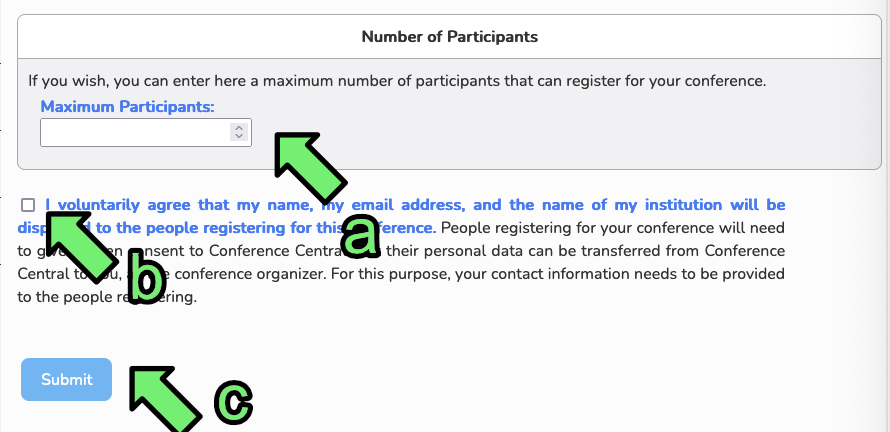
Finally:
(a) Enter the maximum number of registrations.
(b) Tick the checkbox confirming that your contact information may be shared with registrants.
(c) Click "Submit".
-
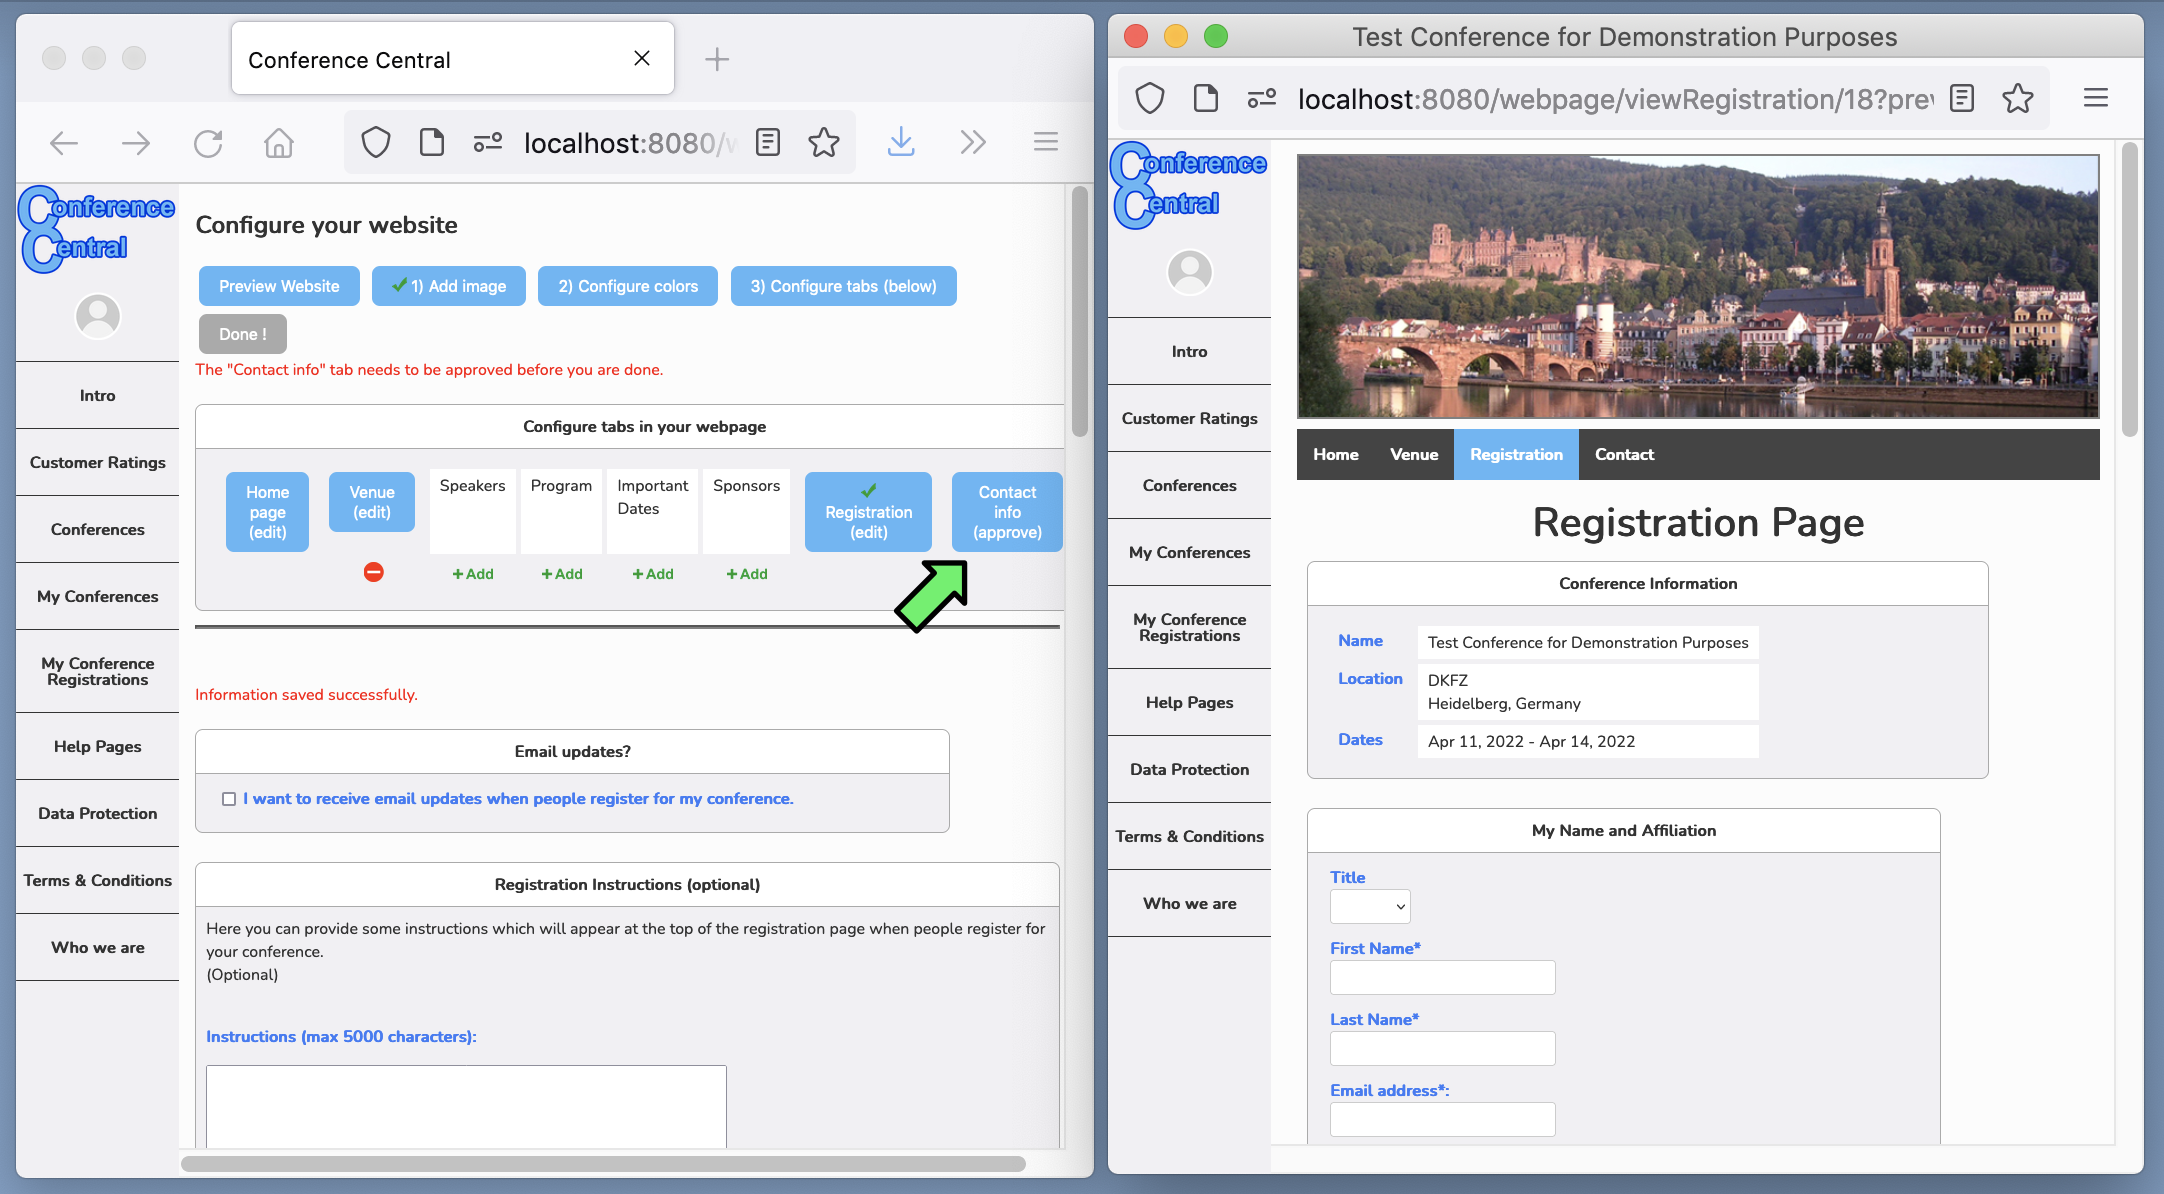
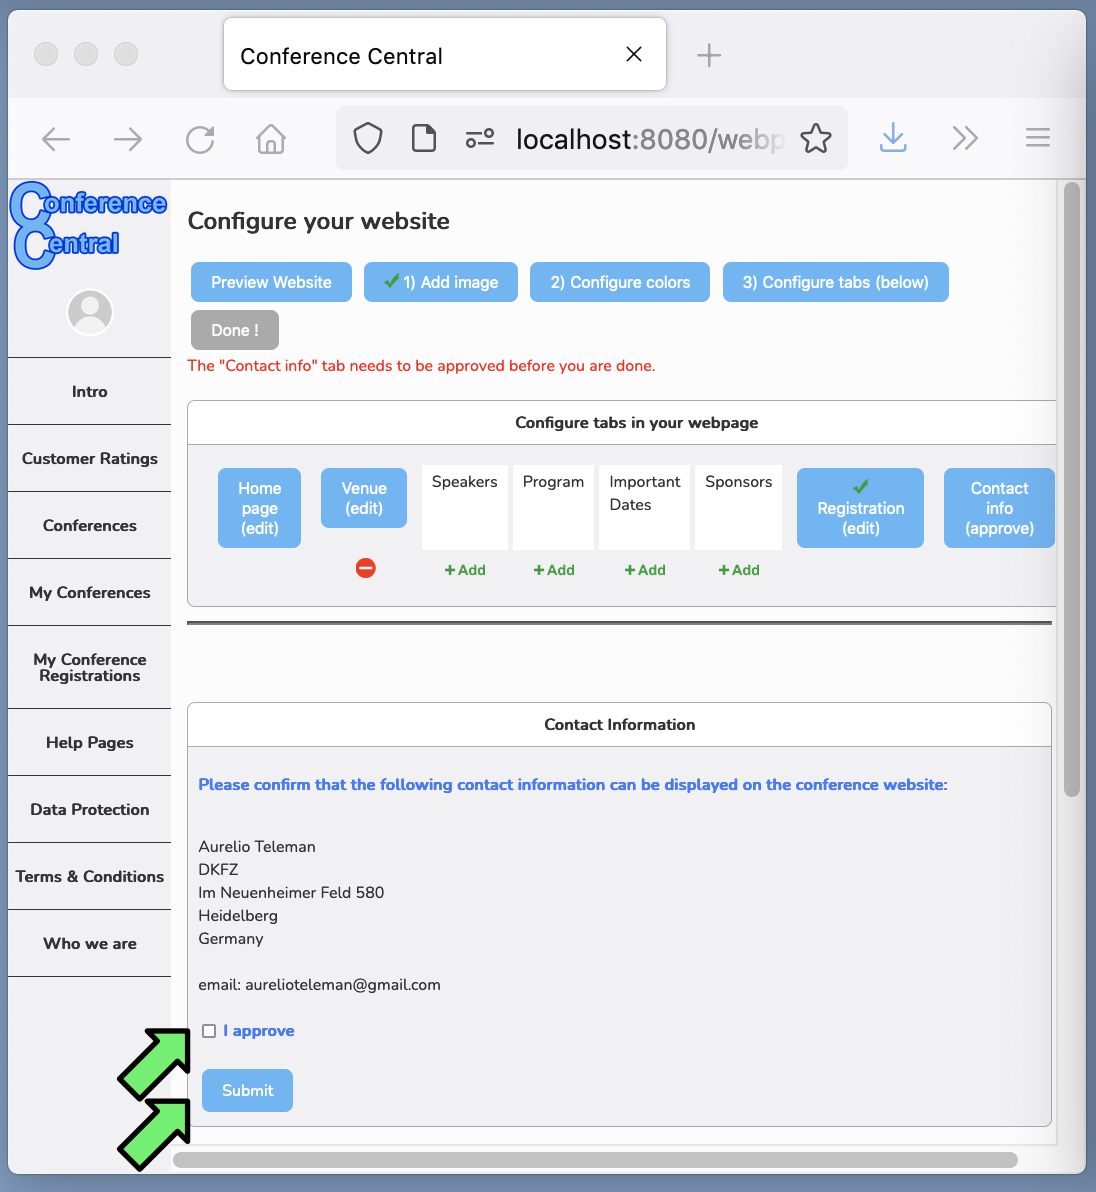
You now have a registration page, visible in the webpage preview. The last step is to click "Contact Info".
-
Click to agree that your contact information will be displayed on the conference webpage. (Your email address is displayed in such a way that robots searching webpages for email addresses will not see it.)
-
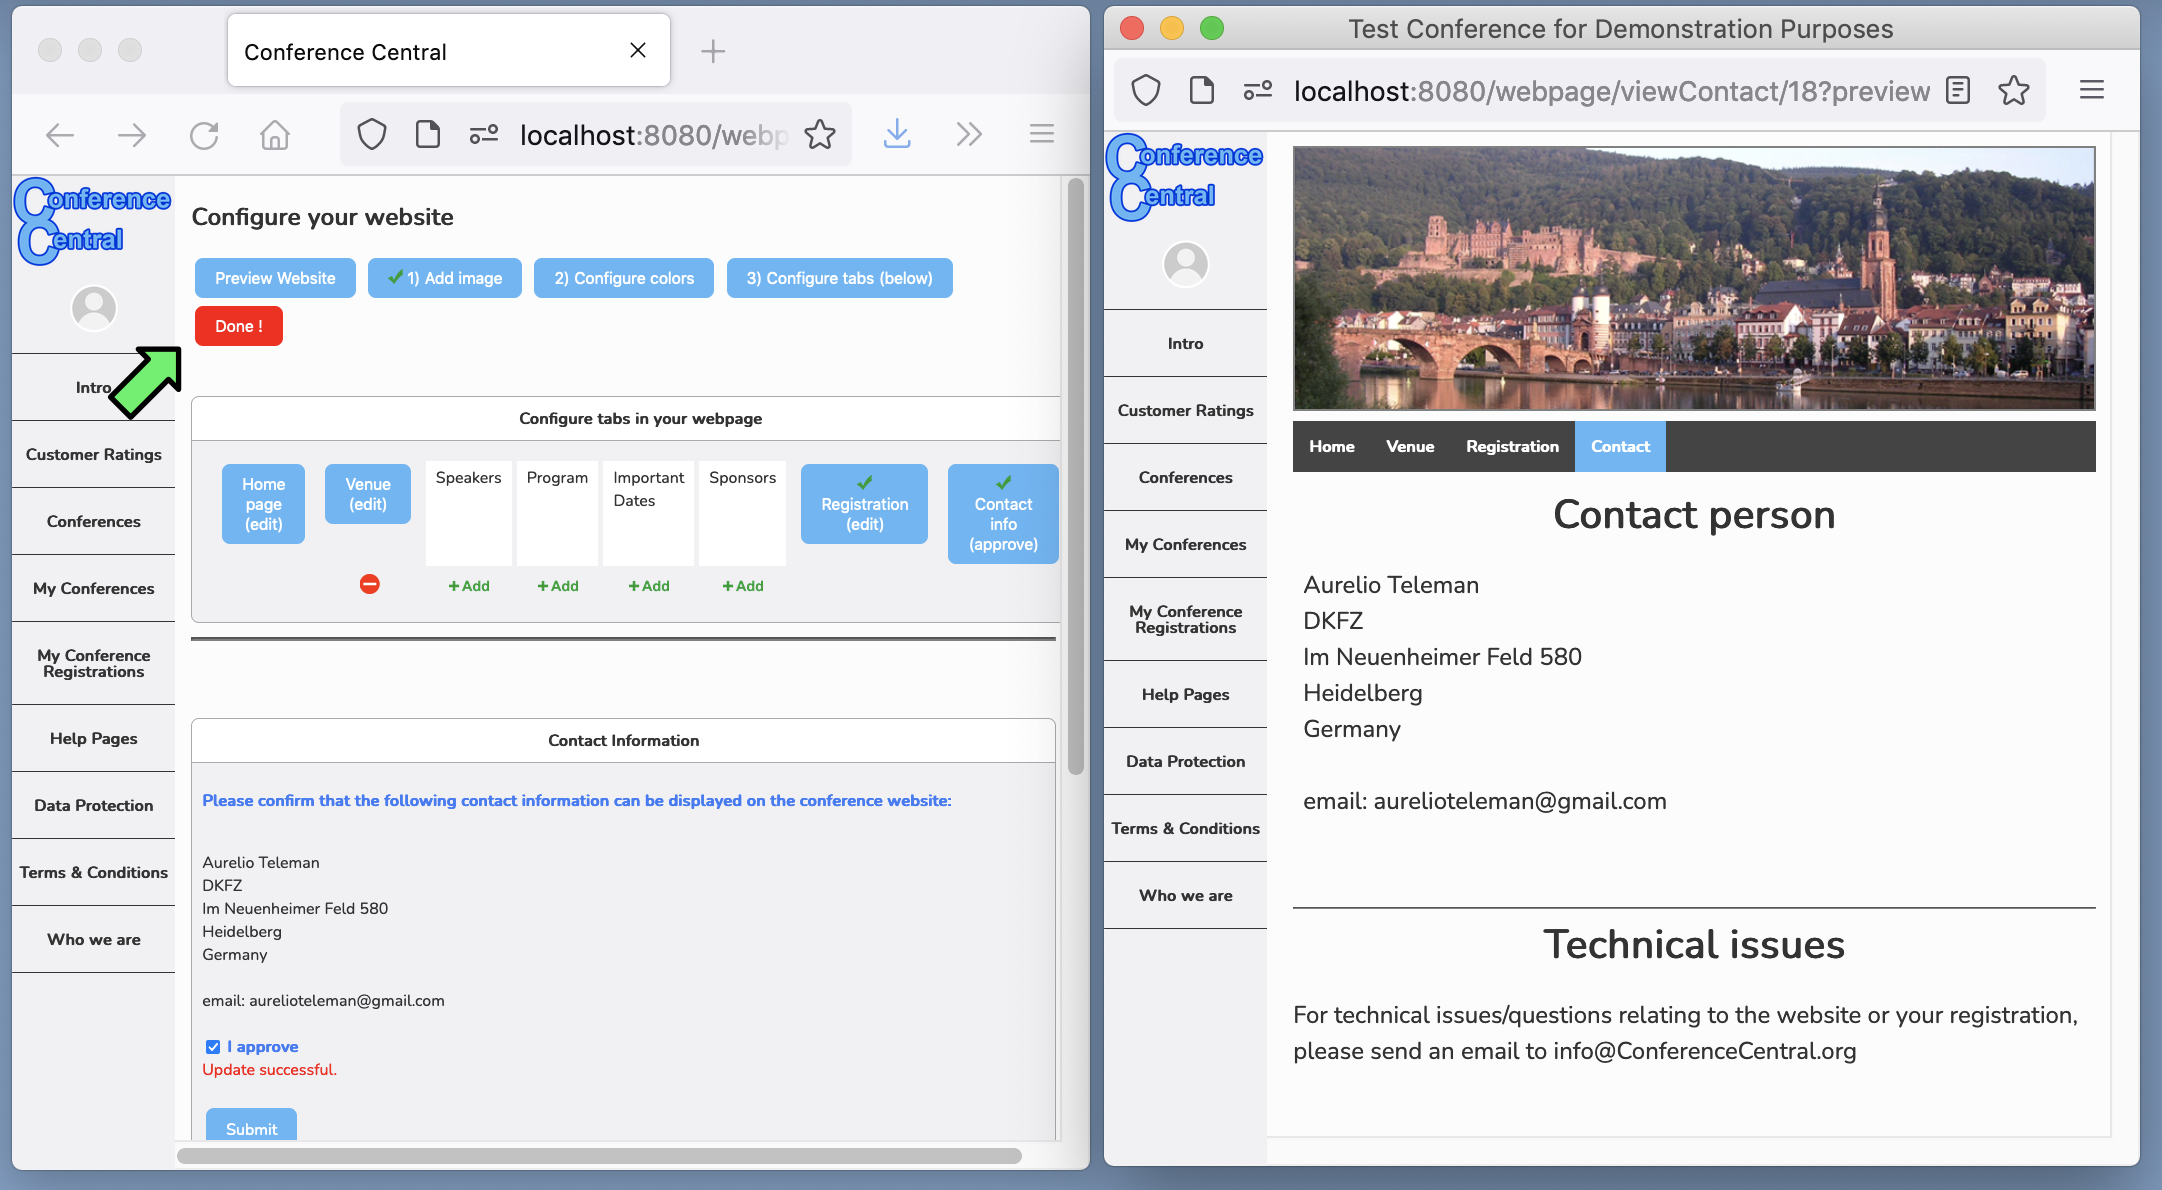
Click "Done". Your webpage is saved but not yet publicly visible — you can keep editing until you're happy. You're welcome to try everything out; nothing is public until you click "Go Live".
-
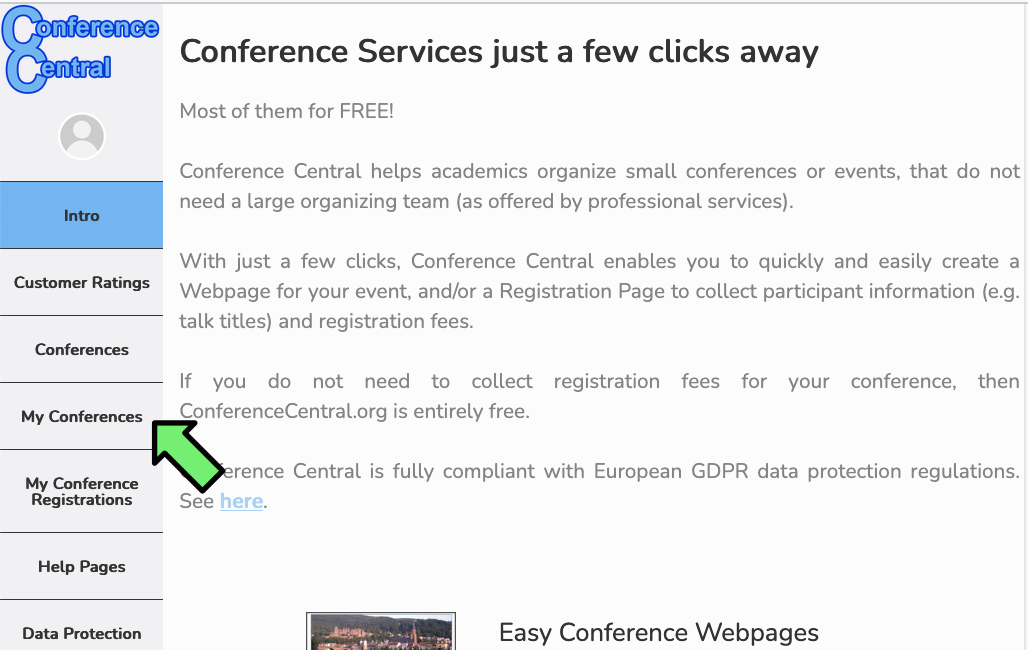
To publish your webpage, click "My Conferences" in the navigation bar.
-
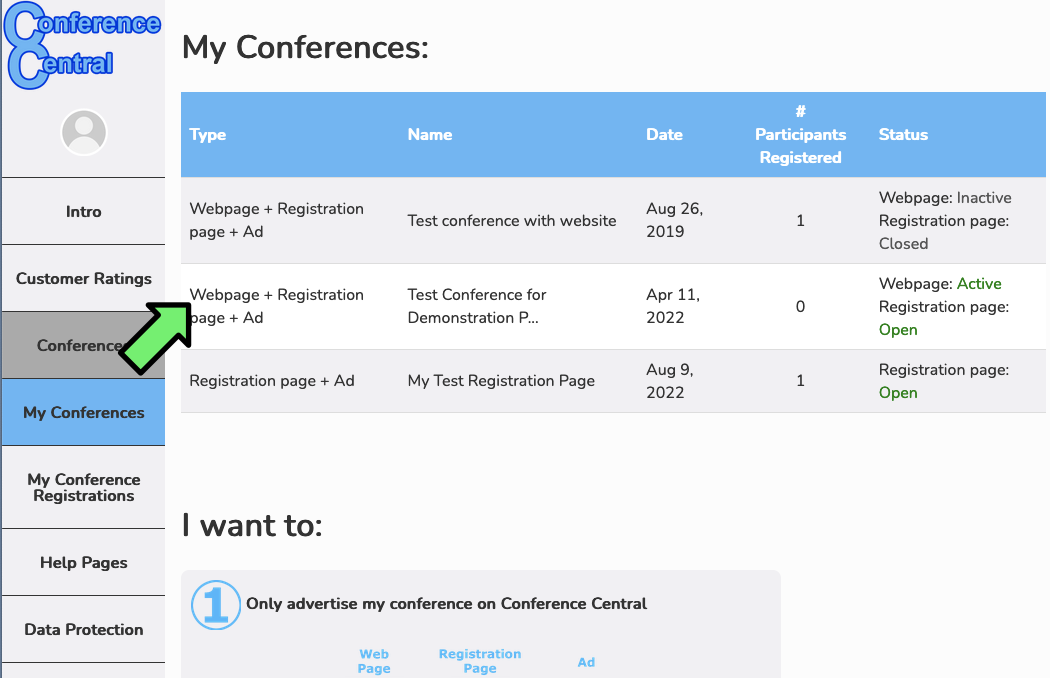
You will see your conference in the list. Click on it to see the details.
-
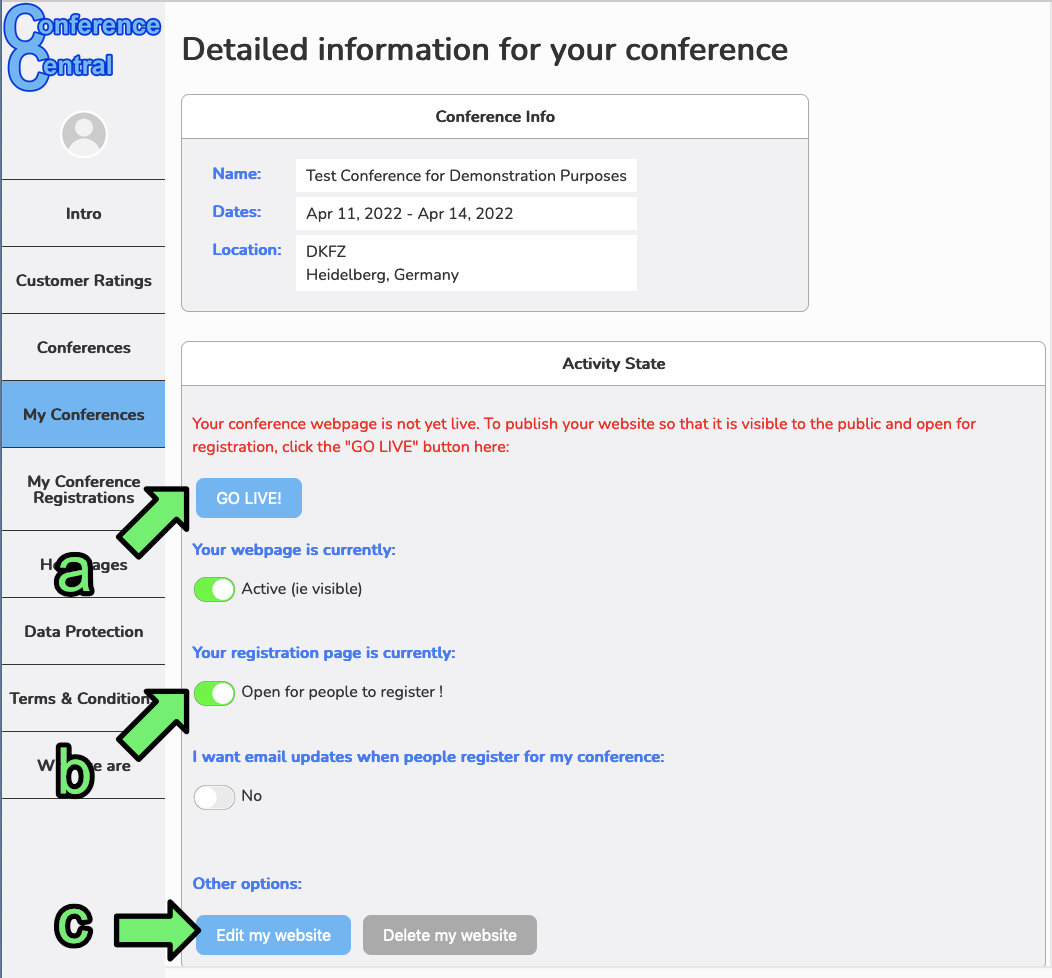
(a) Click "Go Live" to publish your webpage.
(b) Use this button to open or close your registration page. The page will close automatically on the day of your conference.
(c) Use these buttons to edit or delete your webpage.
To see what a completed webpage looks like, click here.
-
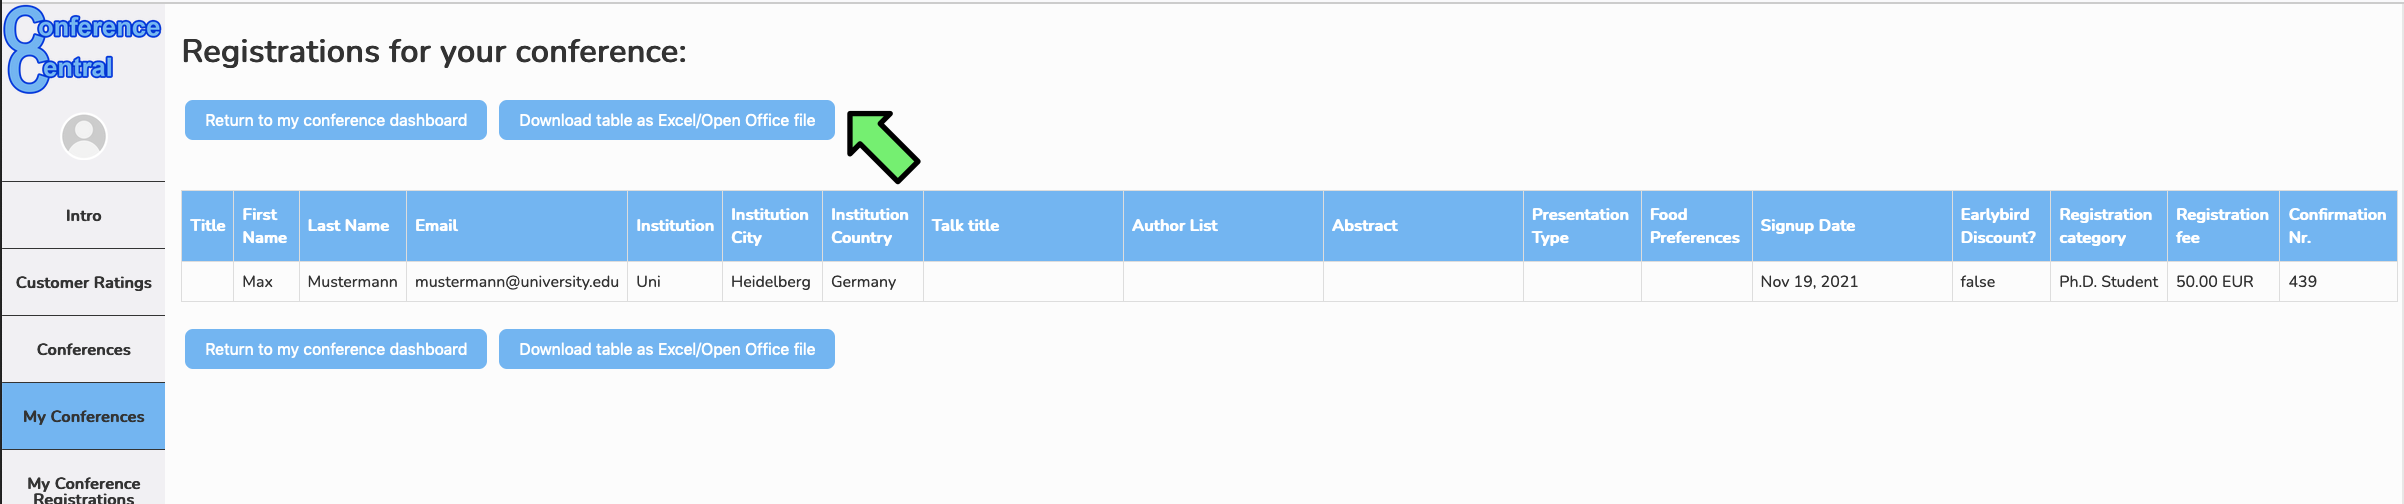
The "Registrations" section gives you an overview (1) of all registrants so far. Click "See list of registrations & details" (2) to view individual registrations and download everything as an Excel sheet.

-
The details page shows all registration data in table format. Click "Download table as Excel / Open Office file" to export it.